
Bitaxe Gamma 601 setup: step by step from unboxing to the first share
30 May 2026 · 17 min read · Updated on 26 September 2026

The Bitaxe Gamma 601 is set up in ten minutes: plug in the power, join its setup Wi-Fi, enter your Wi-Fi, then the pool and your own Bitcoin address. This guide walks through every step with screenshots of AxeOS 2.15, the current firmware, and gives you the values that tell you your Gamma is running correctly. It applies just the same to the 602 and 603 revisions. For all other Bitaxe models there is the general Bitaxe setup guide.
Bitaxe_XXXX shown on the display, enter your 2.4 GHz Wi-Fi on the setup page, Save, Restart. Then open http://bitaxe.local or the IP from the display, go to Pool, enter host stratum.bitaxe.de, port 3333 and your own Bitcoin address as User in Pool 1, Save, Restart. After one or two minutes the dashboard shows about 1.07 TH/s at a chip temperature of around 60 °C. Gamma 601, 602 or 603: what you have in front of you
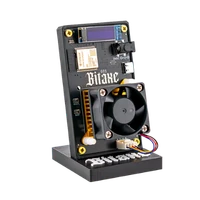
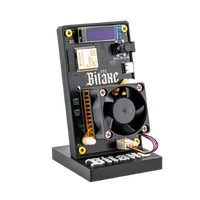
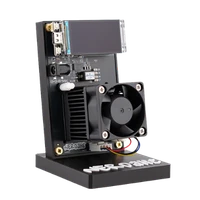
The Gamma is the entry model of the Bitaxe family. It hashes with a single BM1370, the chip from the Antminer S21 Pro, driven by an ESP32-S3 that also runs the Wi-Fi and the AxeOS web interface. On top sit a 40 mm fan on the heatsink and a small 0.91 inch OLED display that shows the setup Wi-Fi, the IP address and the hashrate. Power comes in through a round barrel plug at 5 volts.

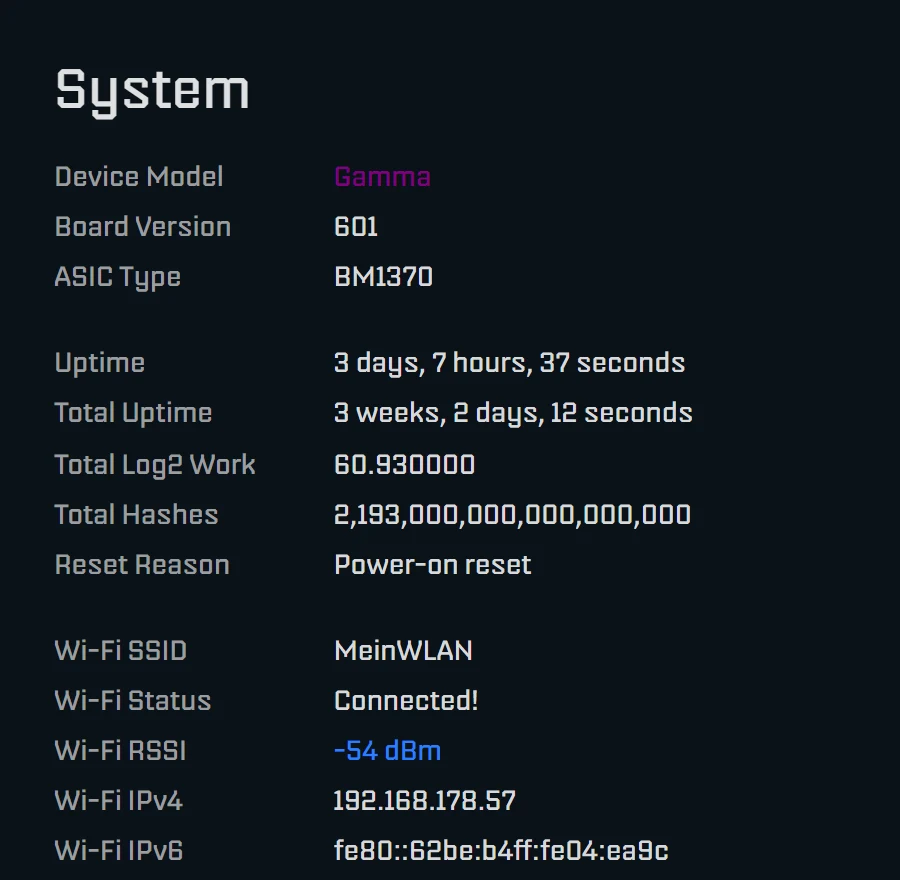
The number after “Gamma” is the board revision. The 601, 602 and 603 have the same chip, the same voltage regulator and the same factory values in the firmware. The revisions fix details: the 601 got a better fan connector, the 602 wider traces and repositioned heatsink holes, the 603 among other things resistors that let pure USB-C ports detect the USB-C socket. For the setup this makes no difference. Which revision you have is shown in AxeOS on the System page under “Board Version”.
| Value | Bitaxe Gamma out of the box |
|---|---|
| Chip | 1 × BM1370 |
| Clock (Frequency) | 525 MHz |
| Core voltage | 1150 mV |
| Expected hashrate | 1,071 GH/s, about 1.07 TH/s |
| Power according to AxeOS | about 15 to 19 W, depending on the chip |
| Power supply | 5 V, at least 6 A (30 W), round barrel plug |
| Fan control | automatic, target 60 °C at the chip |
| Wi-Fi | 2.4 GHz only |
| Display | 0.91 inch OLED, 128 × 32 pixels |
AxeOS calculates the expected hashrate from clock and core count: 525 MHz times 2,040 cores gives 1,071 GH/s. With more clock and good cooling, 1.2 to 1.3 TH/s are possible; how to get there and where the limits are is in the overclocking guide. For the setup you stay with the factory values.
What you need
- The Gamma and the power supply that came with it, 5 V and 6 A.
- Name and password of your Wi-Fi in the 2.4 GHz band. The ESP32-S3 cannot receive 5 GHz networks.
- A Bitcoin address from a wallet whose keys you hold yourself, for example starting with
bc1q. No Lightning address, and preferably not a deposit address of an exchange. - A phone, tablet or laptop with Wi-Fi. You do not need a computer; everything works in the phone's browser.
If your router sends 2.4 and 5 GHz under the same name, it usually works anyway. If the Gamma does not connect, set up a separate 2.4 GHz network or a 2.4 GHz guest network in the router.
Step 1: Place it and connect the power
Put the Gamma on a firm, level surface with about 10 cm of space at the air intake and outlet, not in a closed cabinet, not on fabric and not in direct sun. Good Wi-Fi reception matters more than you might think: when the connection drops, shares are lost.
First push the barrel plug straight and fully into the socket on the Gamma, then plug the power supply into the wall. The USB-C socket does not power the miner, it is only for flashing. Do not hold either of the two buttons on the board while plugging in, otherwise the Gamma starts in service mode or runs a self-test.
After a few seconds the fan and display start. A new Gamma shows the scrolling text “Welcome to your new Bitaxe!” and below “Setup Wi-Fi:” the name of its setup Wi-Fi, for example Bitaxe_2215. The four characters after the underscore differ on every device.
Step 2: Join the setup Wi-Fi Bitaxe_XXXX
Open the Wi-Fi settings on your phone and pick the open network Bitaxe_XXXX with the characters from your display. There is no password. After a few seconds the setup page opens by itself. If nothing happens, open http://192.168.4.1 in the browser. If the phone asks whether to stay on a Wi-Fi without internet, confirm; on Android it sometimes helps to switch off mobile data for a moment.
Step 3: Enter your home Wi-Fi
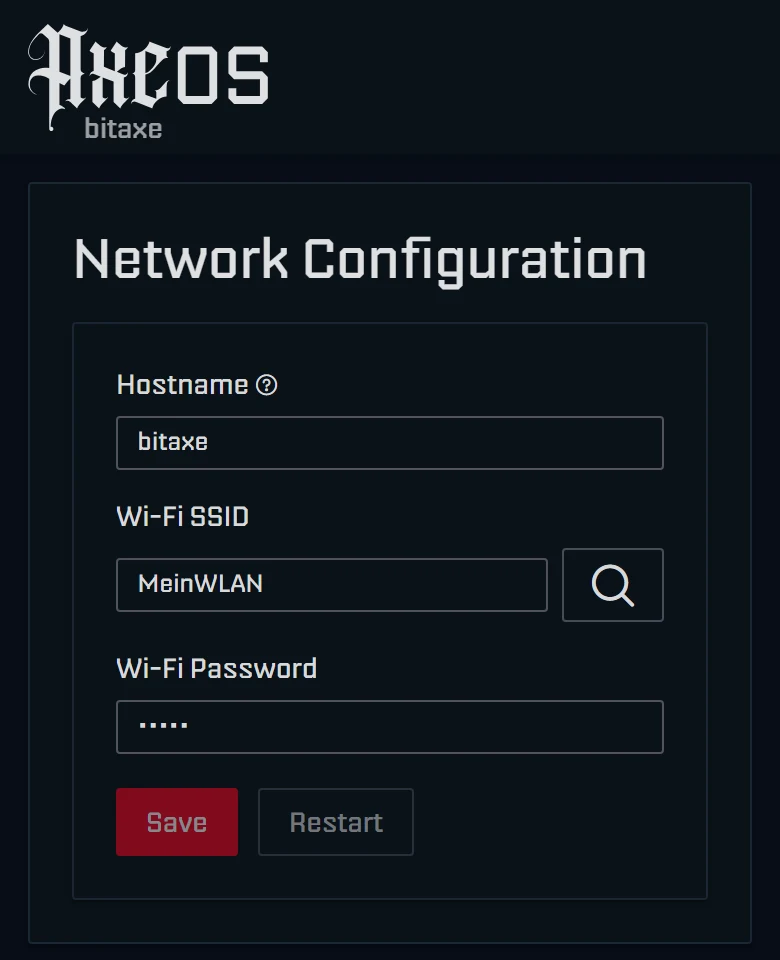
Hostname is the name of the Gamma on your network. Leave bitaxe or give several miners unique names such as gamma-office. You will later reach it under that name as http://bitaxe.local or http://gamma-office.local. Devices with OSM-OS show OSM-Miner there out of the box.
Under Wi-Fi SSID enter the name of your Wi-Fi or search for it with the magnifier. The search does not list hidden networks or networks with a very weak signal; type those in by hand. Wi-Fi Password takes your Wi-Fi password. Mind upper and lower case and trailing spaces.
Tap Save and then Restart. The Gamma restarts, joins your Wi-Fi and switches off the setup Wi-Fi. Your phone returns to your normal network. The display now shows the IP address, for example 192.168.178.57. A short press on the BOOT button moves to the next screen if a different one is showing.
Step 4: Enter the pool and your own Bitcoin address
The pool sends your Gamma its work and accepts its results. We recommend our solo pool pool.bitaxe.de: 0 % fee, server in Frankfurt, no account, and if your Gamma finds a block, the reward goes straight to your address. The pool configurator creates the values ready to copy. Which other pools exist is covered in choosing a mining pool.
Step 1: In the browser of a device on the same Wi-Fi, open http://bitaxe.local or the IP address from the display. If your device does not know names ending in .local, which happens on some Android phones, use the IP.
Step 2: Click Pool in the menu on the left and expand Pool 1, marked “Primary”.

Step 3: Stratum Host is stratum.bitaxe.de, just the name, without stratum+tcp:// and without a port. If you paste a full address such as stratum+tcp://stratum.bitaxe.de:3333, AxeOS 2.15 splits it up by itself. Stratum Port is 3333, and Stratum Protocol stays on “Stratum V1”.
Step 4: The User field contains a foreign address out of the box. Delete it completely and paste your own Bitcoin address. Optionally append a name after a dot, for example bc1q…your-address.gamma601; with several miners you then see in the pool which is which.
Step 5: Enter x as Password. Our pool does not evaluate this field.
Step 6: Pool 2 is set up as the fallback and steps in when Pool 1 cannot be reached. It also has a foreign address out of the box. Enter your own address there too; which pool you use as the backup is up to you.
Step 7: Click Save and then Restart. The Gamma only connects to the new pool after the restart.
stratum.bitaxe.de is already set as the pool, but the User field holds an address of the firmware project. Either way: as long as it stays there, a block found would not go to you. Pool websites write their details in different ways. This is how you spread them over the fields in AxeOS:
| Given on the pool website | Field in AxeOS | Entry |
|---|---|---|
stratum+tcp://stratum.bitaxe.de:3333 | Stratum Host and Stratum Port | stratum.bitaxe.de and 3333 |
| Bitcoin address | User | bc1q…, optionally followed by .gamma601 |
| any password | Password | x |
| Stratum V2, port 3336 | Stratum Protocol and Stratum Port | only after the setup, see setting up Stratum V2 |
Step 5: Check the dashboard
After the restart the Gamma needs one or two minutes until all values have settled. Then open the Dashboard. At the top you see hashrate, efficiency, shares and the best difficulty found.
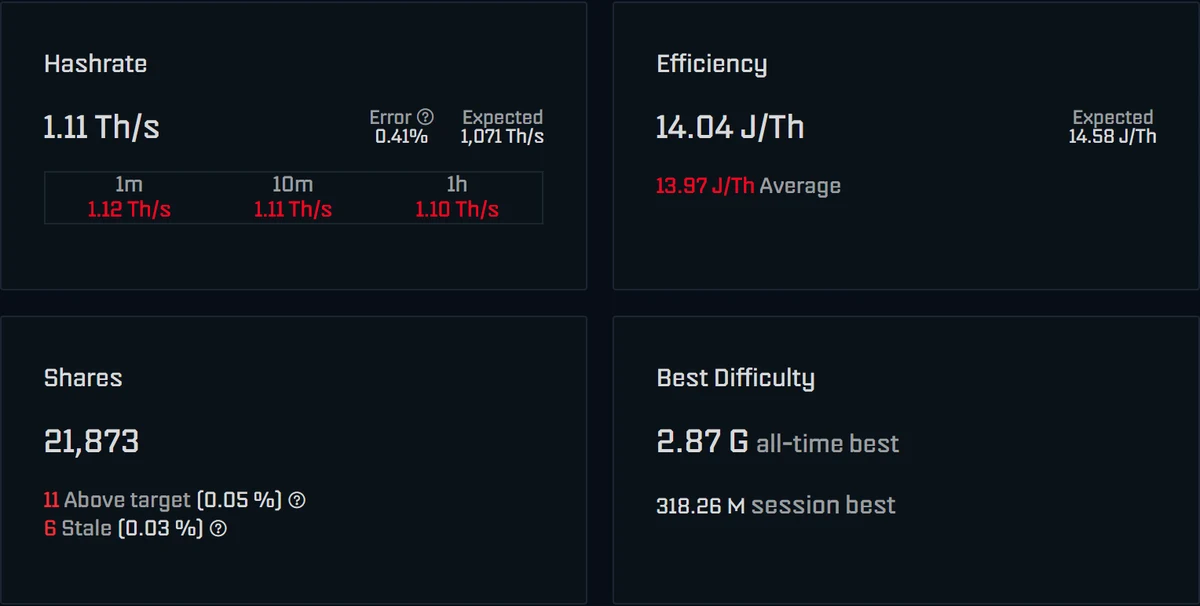
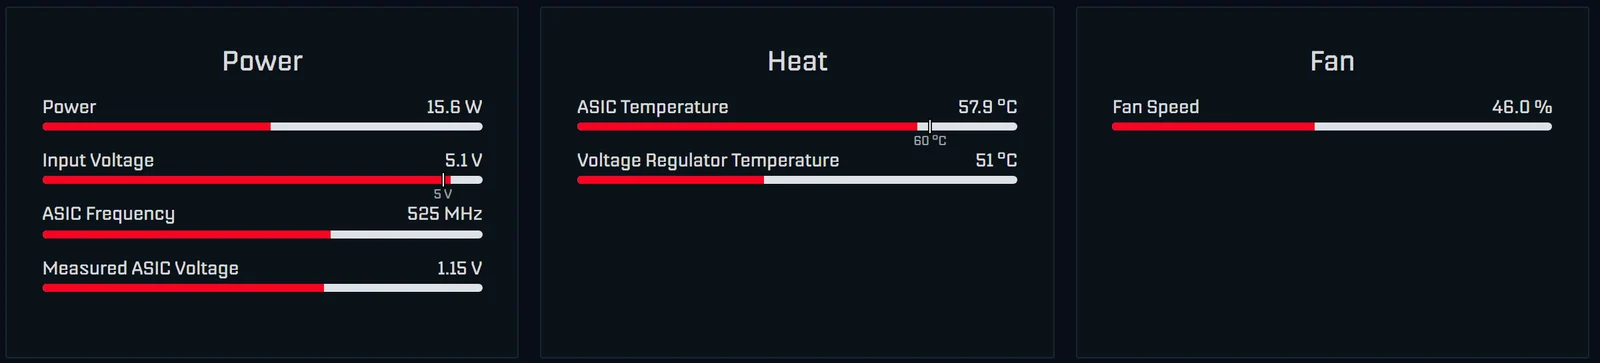
Further down, the Power and Heat cards show power, input voltage, clock, chip and regulator temperature and fan speed. These values are normal for the Gamma:
| Reading | Normal for the Gamma | Act when |
|---|---|---|
| Hashrate (1h average) | around 1.07 TH/s, briefly more or less | permanently below 1.0 TH/s |
| Error | low, occasional errors | clearly higher than usual |
| Shares | rise steadily | stay at zero or more than 1 % rejected |
| Power | about 15 to 19 W | clearly above 20 W at factory clock |
| Input Voltage | around 5.0 to 5.2 V | message “Danger: Low Voltage” (below 4.75 V) |
| ASIC Temperature | around 60 °C | warning from 70 °C, protection above 75 °C |
| Voltage Regulator Temperature | usually 45 to 75 °C | protection above 105 °C |
| Fan Speed | 30 to 70 % depending on the room | permanently 100 % with automatic control on |
On the Gamma the power reading is an estimate: AxeOS takes the power of the voltage regulator and adds 5 W for the rest of the board. At the wall you measure a little more including the power supply. At 17 W that is about 12.4 kWh per month, so around €3.70 at €0.30 per kWh. The mining calculator works it out for your rate.
Finally, check the pool: on pool.bitaxe.de enter your Bitcoin address in the search field. After a few minutes your Gamma shows up there with its hashrate.
AxeOS also checks by itself who a found block would pay: it reads the payout from the pool's work and compares it with the address in the User field. If the reward would go wholly or partly to other addresses, the dashboard warns with “Your share of the mining reward is only …” or “You don't have a share in the mining reward”. With pools that pay out collectively this is normal; with a solo pool like ours it is a reason to check the pool details. A forgotten factory address is not caught by this check; that is what the yellow warning on the Pool page is for.
Factory settings: clock, voltage and fan
The Settings page holds the values the chip runs with. Out of the box they are marked “(Default)”.
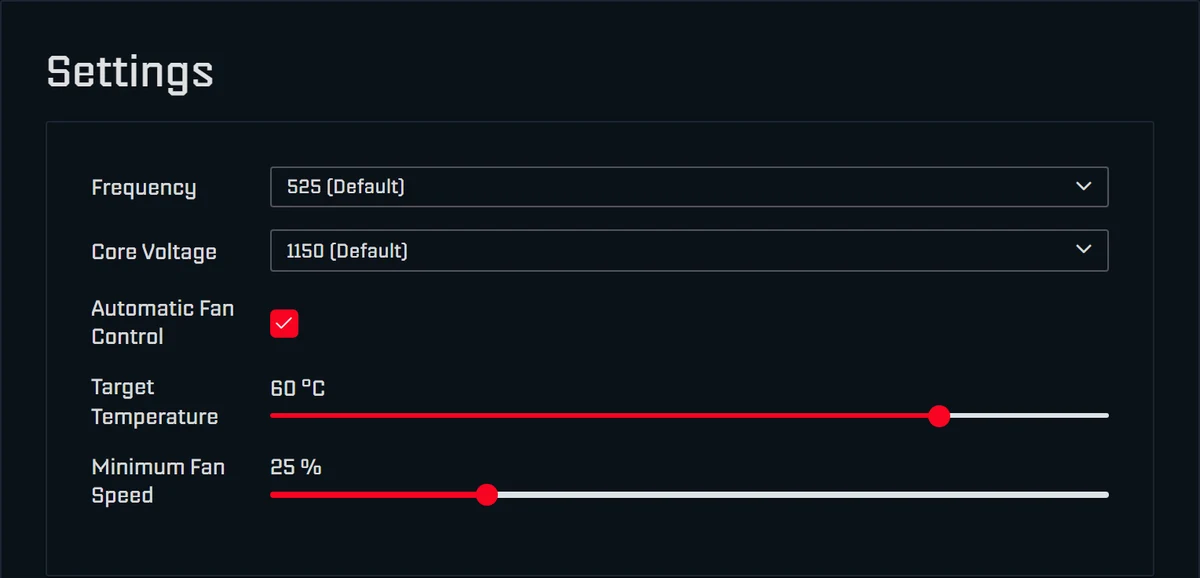
- Frequency is the clock in MHz. The list offers fixed steps from 400 MHz, 525 out of the box.
- Core Voltage is the chip's core voltage in mV, 1150 out of the box. More clock usually needs more voltage and produces more heat.
- Automatic Fan Control drives the fan so the chip stays at the Target Temperature, 60 °C out of the box. Minimum Fan Speed is the speed the fan never drops below.
Leave these values as they are for the first few days. That way you know your device's normal values before you change anything. If you want more hashrate later, follow the overclocking guide; if you want it quieter, see making a Bitaxe quieter. You can return to the factory state at any time by picking the entries marked “(Default)” for Frequency and Core Voltage, Save, Restart.
How hot may the Bitaxe Gamma get?
The chip is allowed to get warm, it is built for that. Automatic fan control keeps it at 60 °C out of the box, and that is where it should sit in continuous operation. When the room gets warmer in summer, the fan spins faster; that is normal.
| Temperature | Chip (ASIC) | Voltage regulator |
|---|---|---|
| normal | 55 to 65 °C | 45 to 75 °C |
| warning in the dashboard | from 70 °C (“Danger: High Temperature”) | from 105 °C |
| overheat protection kicks in | above 75 °C | above 105 °C |
When the protection kicks in, the Gamma stops hashing, sets the fan to a fixed 100 %, waits at least 30 seconds and then carries on with 100 MHz less clock and 100 mV less voltage. The display shows “DEVICE OVERHEAT!”, the dashboard “Device has overheated”. Afterwards you have to switch automatic fan control back on in Settings and check clock and voltage, because the firmware has changed both. The cause is almost always the location, a blocked fan or too much clock.
Resetting the Bitaxe Gamma: restart, new Wi-Fi or factory state
“Reset” on the Gamma usually means one of three things. All of them work without a computer, only the factory state needs one.
- Restart: the icon at the far right of the AxeOS top bar (“Restart”), the RESET button on the board or briefly unplugging the power supply. Settings are kept.
- New Wi-Fi, for example after changing the router: if the Gamma can no longer find its Wi-Fi, it switches the setup Wi-Fi
Bitaxe_XXXXback on by itself. You can also switch it on by hand by holding the BOOT button for two seconds. Then connect as in step 2 and enter the new Wi-Fi; pool and address are kept. - Clock and voltage back to default: on the Settings page pick the entries marked “(Default)” for Frequency and Core Voltage, Save, Restart.
- Factory state: there is no button for it. You flash the firmware again with flasher.bitaxe.de and untick “Keep configuration”. Wi-Fi, pool, address and all settings are then erased. On the first start a self-test runs (“BITAXE SELF-TEST”); after “SELF-TEST PASS!” the Gamma restarts and you set it up as above.
Setup problems and how to solve them
The Wi-Fi Bitaxe_XXXX does not appear
The setup Wi-Fi is only active while the Gamma knows no Wi-Fi or cannot reach its own. If it already knows one, hold the BOOT button for two seconds. If the display stays dark, check the barrel plug and the socket.
The setup page does not open
Open http://192.168.4.1 in the browser, with http and not https. Check that your phone is still connected to Bitaxe_XXXX and has not switched back to your home network or to mobile data.
The Gamma does not connect to the Wi-Fi
The display shows the reason, for example “Incorrect password entered” for a wrong password. The most common other causes: a 5 GHz only network, a signal that is too weak, a guest network with client isolation or a MAC filter in the router. Routers in mixed WPA2/WPA3 mode work reliably since AxeOS 2.15.1; if your Gamma runs an older version, an update helps.
Hashrate but no shares
Then something is almost always wrong with the pool details: a typo in the host or stratum+tcp:// in the wrong field, a wrong port, spaces in the address. Less often the router blocks outgoing connections on port 3333. Bitaxe connected but not mining helps step by step, the miner troubleshooter is the quickest.
Warning “Using fallback pool”
The Gamma cannot reach Pool 1 and is hashing on Pool 2. Check host and port of Pool 1 and restart. The share statistics start from zero again.
Restarts, “Danger: Low Voltage” or “Power Fault Detected”
The power supply delivers too little. If the input voltage drops below 4.75 V, AxeOS warns; if it drops further, the voltage regulator switches off. Use the supplied power supply with 5 V and 6 A, push the plug in fully and do not extend the low-voltage cable. More in power supply for the Bitaxe.
Hashrate clearly below 1 TH/s
First look at the one-hour average, not the momentary value. If that is also clearly below expected, check clock and voltage on the Settings page and the temperature. A high error value is explained in Bitaxe hashrate error explained.
Firmware: is an update needed?
Your Gamma ships with current firmware; an update is not needed on day one. The installed version is shown on the Update page. Current versions are AxeOS 2.15.3 and OSM-OS 2.15.1-osm, the variant optimised for the Bitaxe that we recommend. You can update conveniently with flasher.bitaxe.de over a USB cable or directly in the dashboard; since AxeOS 2.15 a single file is enough. Every route including rollback is in the firmware update guide. All Gamma revisions use the same firmware.
After the setup
Once your Gamma has run stably for a few days, these topics are worth a look, one at a time:
- Understand every reading: AxeOS explained goes through every card of the dashboard.
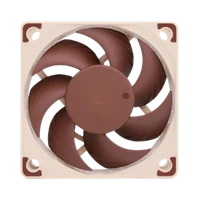
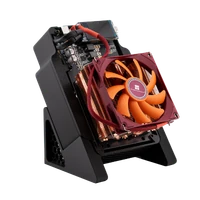
- Make it quieter: the Noctua NF-A4x20, the ICE Tower Low Profile or the copper heatsink make the Gamma quieter or cooler; all routes are in making a Bitaxe quieter.
- Chance of a block: finding a block with a Bitaxe works out how likely a hit is at about 1 TH/s.
- Power cost: Bitaxe power consumption shows what running it costs per year.
- Your own node: with your own Bitcoin node such as the LiquidBox V5 you build your block templates yourself, see running a Bitcoin node and Public Pool on Umbrel.
Matching accessories are under Bitaxe cooling, Bitaxe upgrades and Bitcoin mining accessories. If you do not have a Gamma yet, you find it here: buy the Bitaxe Gamma.
Frequently asked questions about the Bitaxe Gamma 601
How do I set up the Bitaxe Gamma 601?
How do I find the IP address of my Bitaxe Gamma?
What hashrate does the Bitaxe Gamma 601 have out of the box?
How hot may the Bitaxe Gamma get?
What is the difference between the Gamma 601, 602 and 603?
How do I reset the Bitaxe Gamma?
How do I connect the Gamma to a new router?
Does the Bitaxe Gamma work with 5 GHz Wi-Fi?
Which power supply does the Bitaxe Gamma need?
Which pool should I use with the Gamma?
Do I have to update the firmware after unboxing?
Matching products


Read more
Nerdaxe Gaia: what the BM1373 miner can do, which firmware to run and who it is for
A single BM1373 in the familiar Nerdaxe format: factory settings from the source code, hashrate and power draw with every documented figure, the 12-volt power supply, OSM-OS from the flasher, setup, overclocking up to the current limit, block odds and electricity cost, plus a comparison with the Nerdaxe Gamma, Bitaxe GT and NerdQaxe++.
Guides & knowledgeSetting up Stratum V2 on a Bitaxe: encrypted solo mining in five fields
Since AxeOS 2.14 every Bitaxe speaks Stratum V2, and since September 2026 so does the Bitaxe Pool. This guide walks through the AxeOS fields one by one, shows how to set up the fallback and verify the connection, and lists what goes wrong when no shares arrive. For Bitaxe, NerdQaxe and large ASICs.
Guides & knowledgeNerdQaxe++ review: 4.8 TH/s from four BM1370, and who should upgrade from a Bitaxe
Four BM1370 on one board, 4.9 TH/s expected out of the box, about 76 W, two fans and NerdOS in the browser: we put the NerdQaxe++ in context. Factory values from the firmware, board revisions, noise, running costs, block odds, setup in NerdOS and the comparison with the Bitaxe Gamma, GT and 702, Copper Pro, Hydro, NerdQX and NerdOctaxe.