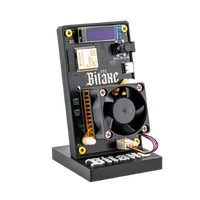
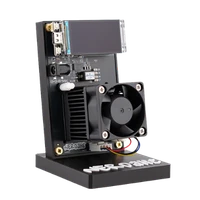
Overclocking a Bitaxe: a safe guide to more hash rate
18 May 2026 · 46 min read · Updated on 6 June 2026
After the first few days many Bitaxe users ask the same question: is there more in it?
The short answer: often yes. The more important answer: only if the cooling, the power supply and the settings fit together.
That is exactly what makes the Bitaxe so interesting. It is not a closed industrial miner where you simply have to accept what the manufacturer dictates. A Bitaxe is open-source hardware. You can understand it, configure it, optimise it and adapt it to your own setup.
But that is also where the responsibility lies.
Overclocking does not simply mean: frequency up, voltage up, done. Anyone overclocking their Bitaxe blindly may get a nice number in the dashboard for a few minutes. That does not mean the miner really runs better. If temperatures rise, errors increase or the miner becomes unstable, the higher hash rate on paper does little for you.
So the goal in Bitaxe overclocking is not the highest screenshot value. The goal is a miner that runs stably over time, is cooled cleanly and gets a little more performance out of the hardware while doing so.
In this guide we show you step by step what to watch out for before overclocking your Bitaxe. We explain which values in AxeOS matter, how frequency and voltage interact, when better cooling makes sense and why a good power supply becomes more important during tuning than many people think at first.
One thing matters: every Bitaxe reacts a little differently. Two miners can be the same model and still respond differently to higher settings. The ASIC, the cooling, the power supply, the room temperature and even the location make a difference.
So this article is not about wild maximum values for you to copy blindly. It is about understanding your own setup cleanly and improving it in a controlled way.
If you want to run your Bitaxe more stably, more coolly and perhaps a little faster, overclocking is an interesting next step.
What does overclocking mean on a Bitaxe?
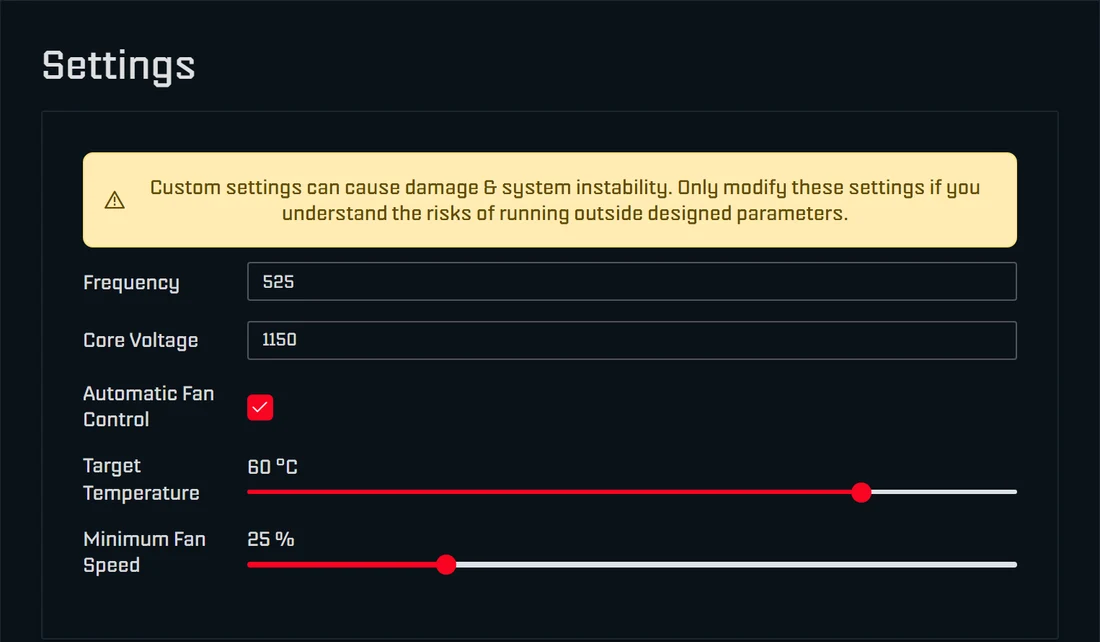
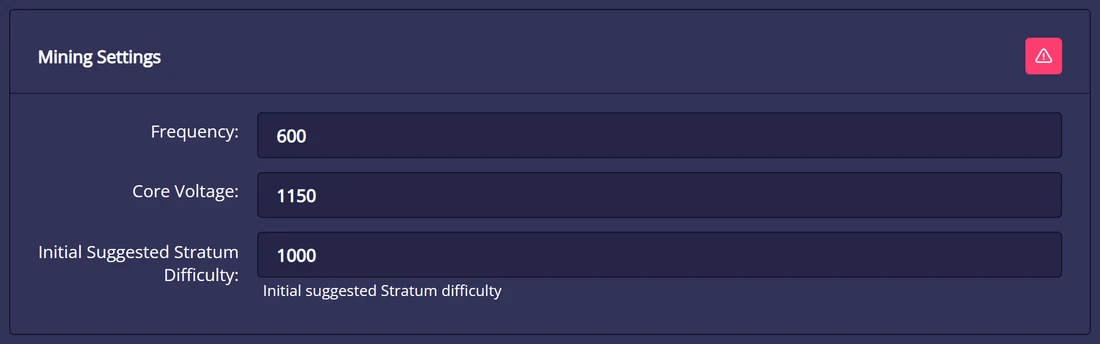
On a Bitaxe, overclocking means running the ASIC chip with higher settings than in normal stock operation. At its core that is mainly about two values: frequency and voltage.
The frequency determines how fast the ASIC works. If the frequency is raised, the miner can perform more operations per second. That can raise the hash rate.
The voltage ensures the chip can work stably at that higher frequency. The higher you clock the ASIC, the more likely it becomes that the voltage has to be adjusted too. That sounds simple, but in practice it is the point where many mistakes happen.
Because more voltage does not simply mean more performance. More voltage also means more power draw, more heat and more strain on the hardware. If the cooling is not enough or the power supply does not play along cleanly, the miner can become unstable.
So a higher frequency can bring more hash rate. But it can also cause more errors, higher temperatures and worse efficiency.
That is exactly why overclocking a Bitaxe is always an interplay of several factors:
The hash rate has to rise without the hash rate error becoming conspicuously high. The ASIC temperature has to stay under control. The VR temperature must not be ignored. The power supply needs enough headroom. And the miner should not just run for five minutes but stay stable over time.
A good overclock is not the most aggressive setting.
A good overclock is a setting where your Bitaxe runs cleanly, holds good temperatures and works reliably over a longer period.
Frequency, voltage and hash rate explained simply
The frequency is the first value many users change when overclocking. It sets the clock the ASIC works at. Raise the frequency and the miner can reach a higher hash rate.
But the ASIC also has to manage that higher clock stably. If the frequency is too high, errors appear. Then the displayed hash rate may rise briefly while the miner works uncleanly or becomes unstable.
The core voltage is the voltage for the ASIC. It can help make a higher clock more stable. But it is not a free boost. Every increase in voltage generates more heat and raises power draw.
So voltage should never be raised blindly.
The better order is: first understand how the miner runs at stock. Then raise the frequency carefully. Then watch how hash rate, temperature and error values change. Only when the miner becomes unstable at a higher frequency while the temperatures still look good can a small voltage adjustment make sense.
In the end the hash rate is only the visible result. It matters, but it is not the only value that counts.
If your miner shows more hash rate but runs hotter, produces more errors and restarts regularly, that is not good tuning. The dashboard may look better for a moment, but your setup has got worse.
Why more MHz is not automatically better
When overclocking a Bitaxe the temptation is strong to look only at the highest hash rate. More MHz, more TH/s, done.
It is not that simple.
In mining what counts is not the highest value in the dashboard but the real, stable performance over time. A miner that briefly shows a high hash rate but produces errors or restarts after an hour is not configured cleanly.
More frequency can push the ASIC to its limit. If the voltage, cooling or power supply do not fit, the hash rate error rises. The temperature climbs. The fan has to work harder. Efficiency can get worse. In the worst case the miner becomes unstable.
So a slightly lower but stable setting is often better than an aggressive overclock that only looks good on paper.
A Bitaxe does not have to prove it can hit a record value for five minutes. It should run reliably.
That is exactly the difference between a screenshot overclock and an everyday overclock.
A screenshot overclock looks good.
An everyday overclock is still running stably tomorrow.
Before overclocking: the values you should check
Before overclocking your Bitaxe you should first know how your miner runs in normal operation. Overclocking is not a repair mode. If your Bitaxe is already unstable at stock settings, runs too hot or produces many errors, higher settings will not make it better. Usually they only make the problem more obvious.
So the first step is always a clean baseline test.
Let your Bitaxe run for a few hours with normal settings. A test overnight is even better. During that time do not touch the frequency or voltage, just observe: is the miner running stably? Does the hash rate stay reasonably constant? Do the temperatures keep climbing or do they settle? Are there restarts, disconnects or conspicuous errors?
Those starting values matter because they let you compare later. Without a baseline you do not know whether your overclock is really better or only different.
If your Bitaxe shows slightly more hash rate after tuning but runs considerably warmer, produces more errors and uses more electricity, that is not automatically a good result. If it delivers more hash rate while staying stable, cool and clean, you have probably found a sensible setting.
Measure a baseline first, then tune
A baseline does not have to be complicated. It is enough to note the most important values from AxeOS or take a screenshot of the dashboard.
What matters most are the values that show whether your miner runs stably and healthily: hash rate, hash rate error, ASIC temperature, VR temperature, fan speed, power draw and uptime. You should also note which power supply you use, how your miner is cooled and where it stands.
A Bitaxe on an open desk with clean airflow behaves differently from a Bitaxe in a tight shelf. A miner in a cool room has more headroom than one running next to other warm devices in summer. The power supply makes a difference too, especially once you work with higher settings.
So the baseline is not only the dashboard but also your real setup.
Note down, for example:
| Value | Before overclocking | After overclocking |
|---|---|---|
| Frequency | stock value | new value |
| Core voltage | stock value | new value |
| Hash rate | stable average | new average |
| ASIC temp | after 1–2 hours | after 1–2 hours |
| VR temp | after 1–2 hours | after 1–2 hours |
| Hash rate error | low / conspicuous | comparison |
| Power | current draw | new draw |
| Uptime | stable for several hours | long-term test |
| Power supply | current unit | unchanged / upgrade |
| Cooling | stock / upgrade | unchanged / upgrade |
| Location | open / shelf / warm room | unchanged / improved |
This table helps you judge your tuning cleanly. You do not have to turn it into a science, but a few comparison values save you a lot of guesswork later.
These AxeOS values matter
When overclocking a Bitaxe many people look only at the hash rate first. That is understandable but not enough. AxeOS shows several values that together decide whether your setup really runs well.
The frequency shows the clock the ASIC works at. Raise it and the hash rate can rise. But so does the strain.
The core voltage shows the voltage for the ASIC. It can help run higher frequencies more stably but also generates more heat and more power draw.
The hash rate shows the current compute performance. What matters is not the highest brief peak but a stable average over a longer period.
The hash rate error is one of the most important warning values in overclocking. If it rises noticeably after a change, your miner is no longer working cleanly. Then the higher hash rate on the dashboard can be deceptive.
The ASIC temp shows the temperature of the mining chip. It should not rise uncontrolled after a change.
The VR temp shows the temperature of the voltage regulation. This value is often underestimated but matters a great deal in overclocking. Even if the ASIC itself still looks fine, voltage regulation that is too warm can cause problems.
Fan speed tells you how hard the fan has to work. If it runs very high permanently, that is a sign your setup is already thermally strained.
Power shows the electricity draw. More hash rate almost always costs more electricity. What matters is whether the ratio still makes sense.
Uptime shows how long the miner runs without a restart. A setting that only works briefly is not a good setting. A good overclock has to stay stable over time.
When your Bitaxe is ready for overclocking
Your Bitaxe is ready for first overclocking tests when it runs cleanly at stock. That means: the hash rate is stable, the miner stays reachable, there are no restarts and the temperatures settle at a sensible level.
The hash rate error should stay unremarkable too. A low or stable error value is a good sign. If the value is already conspicuously high at stock or rises quickly, find the cause before overclocking.
The cooling should also feel relaxed. If the fan is already running at its limit without overclocking, your next lever is not the frequency but the airflow or the cooling.
The same goes for the power supply. If your miner already feels unstable under normal load, the power supply gets very warm or you use a cheap no-name unit, check the power supply before testing higher settings.
In short: a Bitaxe is ready for overclocking when it runs boringly stably beforehand.
That is the best foundation.
When you should not overclock yet
You should not overclock your Bitaxe yet if it already has problems with normal settings.
If the hash rate fluctuates strongly, the miner restarts regularly, the dashboard is sometimes unreachable or the pool connection drops, solve those problems first. Overclocking usually amplifies such weaknesses.
High temperatures are a clear warning sign too. If the ASIC or VR temperature already climbs noticeably at stock, or the fan runs high permanently, your setup lacks thermal headroom.
In that case simply giving it more frequency or more voltage does little. You would only put more strain on an existing problem.
It is better to improve the basics first: place the miner more openly, improve airflow, check the heatsink, remove dust, check the power supply, update the firmware and stabilise the connection to the pool.
Only once the miner runs stably afterwards is the next step worthwhile.
The most important rule: stable first, faster second
In Bitaxe overclocking there is one simple rule that matters more than any individual value:
Stable first, faster second.
Many users make the mistake of going straight for the highest possible clock. They raise the frequency sharply, perhaps add a little more voltage and then look only at the hash rate. If a higher number appears there briefly, that feels like success at first.
But that is not necessarily good overclocking.
A Bitaxe that briefly shows more hash rate while running hot, producing errors or restarting after a while is not better configured. It is only configured more aggressively.
Good overclocking means the miner runs better as a whole system. The hash rate may rise, but not at any price. Temperature, hash rate error, power draw, fan behaviour and uptime all have to stay right.
So you should not ask yourself:
How far can I push the Bitaxe?
The better question is:
Which setting runs stably on my Bitaxe over time?
That is exactly the difference between a brief record value and a genuinely good setup.
Why stability matters more than a high peak
A high hash rate peak looks good. For a screenshot, a post or a quick test that may be interesting. For real mining, though, what counts is not the best moment but the stable average.
If your miner runs cleanly for several hours, works consistently and produces no conspicuous errors, that is far more valuable than a brief spike.
Mining is about sustained work. A Bitaxe that runs stably delivers shares to the pool continuously or works reliably in solo mining. An unstable miner loses time through restarts, disconnects or faulty work.
So a slightly lower setting is often the better choice if it runs cooler, more stably and more efficiently in return.
A good overclock feels almost boring day to day: the miner just runs. No constant restarts, no wild temperature swings, no permanently roaring fan and no error values that shoot up after every change.
That is exactly the goal.
When a setting is really stable
A setting is not stable just because the miner runs for five minutes.
Many problems only show up after a longer time. Right after the start the miner is still cooler, the room may not have warmed up and the load has not fully settled. After 30 minutes, two hours or overnight the setup often looks different.
So always test new settings in two stages.
The first test is short. After every change, watch the miner for 15 to 30 minutes. In that time you spot coarse faults: sharp temperature rises, immediate restarts, conspicuous hash rate errors or an unstable hash rate.
If that short test looks good, the longer test follows. Let the miner run for several hours. For a final setting, a test overnight or across a whole day is better still.
You recognise a stable setting by the miner staying clean even after a long run time. The hash rate should not swing wildly, the hash rate error should not rise noticeably, ASIC and VR temperature should stay under control and the uptime should keep counting.
Only then can you say: this setting really works in my setup.
Overclocking a Bitaxe step by step
Once your Bitaxe runs stably at stock, you can start the actual tuning. What matters is going slowly and comprehensibly.
Always change one value at a time. If you change the frequency, voltage, cooler, fan curve, power supply and location at once, you will not know later what helped and what caused the problem.
Overclocking works best like a clean test: one change, observe, compare, decide.
Step 1: save the stock values
Before changing anything, record your starting values.
It is best to take a screenshot of the AxeOS dashboard and additionally note which power supply, which cooling and which location you use. That information may feel incidental right now but becomes very helpful later.
If your miner becomes unstable after a change, you need a safe point to return to. Your stock values are exactly that point.
Note in particular the frequency, core voltage, hash rate, hash rate error, ASIC temp, VR temp, power and uptime. If you already use a special cooling setup, write that down too.
That lets you compare cleanly later: did the new setting really achieve something? Or does only a single value look better while the setup as a whole got worse?
Step 2: raise the frequency carefully
The frequency is normally the first value you touch when overclocking a Bitaxe.
Do not raise it sharply but carefully, in small steps. The exact headroom depends on the model, the ASIC, the cooling and your setup. So there is no value that is perfect for every Bitaxe.
What matters is the procedure.
After every small increase, let the miner run and watch the values. Does the hash rate rise? Do the ASIC temp and VR temp stay under control? Does the hash rate error stay unremarkable? Does the miner keep running stably?
If so, the step was good.
If the temperature rises noticeably, the hash rate error becomes conspicuous or the miner runs unstably, the step was too big or your setup has reached a limit.
Then it is better to go back a step than simply to keep raising it.
Step 3: do not raise the voltage blindly
When the miner becomes unstable at a higher frequency, many people immediately think of more voltage. That can sometimes help, but it is not always the right solution.
More voltage can stabilise the ASIC at a higher clock. At the same time it generates more heat, raises power draw and puts more strain on the setup.
So do not use voltage as your first lever.
The better order is: raise the frequency slightly first. Then observe. If the miner becomes unstable, check the temperature, hash rate error, power supply and cooling first. Only if the temperatures still look good and the miner drops out for lack of stability rather than because of heat can a small voltage adjustment make sense.
A simple rule of thumb:
Unstable but cool: a small voltage adjustment can help.
Unstable and hot: lower the frequency or improve the cooling.
If you try to solve a thermal problem with more voltage, you usually make it worse. The miner gets hotter, the fan has to work harder and stability can still get worse.
Step 4: compare after every change
After every change you should not only check whether the hash rate has risen. Always compare the whole picture.
A good new setting should not only be faster. It should also stay controlled.
Ask yourself after every change:
Does the hash rate run more stably or does it swing more? Does the hash rate error stay low? Do the ASIC temp and VR temp rise only slightly or noticeably? Does the fan spin much higher than before? Does the power draw still make sense relative to the extra performance? Does the miner keep running without a restart?
If only the hash rate looks better while all the other values get worse, the setting is probably not good.
Overclocking is always a compromise. You are not looking for the highest single value but for the best balance of performance, temperature, consumption and stability.
Step 5: remember the last stable setting
At some point in tuning you will reach a step that no longer works well. That is normal.
Perhaps the hash rate error suddenly rises. Perhaps the miner gets warmer than before. Perhaps it restarts after a while. Perhaps the next frequency step brings hardly any more hash rate but noticeably more consumption.
Then the right move is not to force the problem.
The right move is to go back to the last stable setting.
That last stable setting is usually your best candidate for everyday use. It is not necessarily the highest value, but the value that really works in your setup.
That is exactly why documentation helps so much. If you note your steps, you know later exactly which setting ran well and which did not.
Step 6: run a long-term test
Once you have found a setting that looks good, run a long-term test.
Let the Bitaxe run for several hours. A test overnight or across a whole day is better still. Watch whether the values really stay stable or whether problems appear after a longer time.
The hash rate error, ASIC temp, VR temp and uptime matter most. If those values still look clean after a long run time, you have probably found a good setting.
A setting that only works briefly is a test value.
A setting that runs stably for many hours is a real everyday setting.
Practical overclocking examples
So far this has been mainly about the right approach. Now let us look at typical situations from practice. That is where it is decided whether an overclocking setting is really sensible or only looks good on the dashboard.
Important: the following examples are not fixed values for you to copy blindly. Every Bitaxe, every power supply, every cooler and every environment is a little different. The examples are there to show you how to think and test, not which number to enter exactly.
Bitaxe overclocking is not about copying someone else’s setting. It is about reading your own setup cleanly.
Example 1: light tuning for everyday use
The first and, for most users, most sensible scenario is light tuning. You do not want to go to the absolute limit but want a little more hash rate without the miner getting noticeably hotter, louder or less stable.
That is the best way into overclocking.
Your Bitaxe runs stably at stock. The hash rate is constant, the hash rate error unremarkable, the ASIC and VR temperatures relaxed and the fan does not spin high permanently. In that case you can raise the frequency carefully and then watch what happens.
At the start, leave the voltage unchanged. That matters because you first want to see how far your miner runs cleanly at the existing voltage. If you change the frequency and the voltage at the same time, you will not know later which value had which effect.
After the first small increase, watch the miner for 15 to 30 minutes. If the hash rate rises slightly, the temperatures increase only moderately and the hash rate error stays unremarkable, that looks good. Then you can test another small step later.
If the hash rate error rises noticeably or the temperature climbs quickly, the step was too big. Then go back.
The goal in light tuning is not maximum hash rate. The goal is a better everyday setting.
A good result would be: a little more hash rate, still stable temperatures, no conspicuous hash rate error and no restarts. That is what sensible Bitaxe overclocking looks like.
Example 2: more performance with better cooling
The second scenario is interesting for users who do not just want to tune their Bitaxe lightly but want to create more thermal headroom. This is about better cooling, for example through a stronger heatsink, better thermal paste, a better fan or a more open enclosure.
The order matters.
When you fit better cooling, do not set high overclocking values at the same time. First change the cooling, then test again.
After the cooling upgrade, let the Bitaxe run at normal settings first. That shows whether the cooler is mounted correctly and whether the temperatures really have improved. If the ASIC temperature drops, the VR temperature stays unremarkable and the miner runs stably, you have a better basis for tuning.
Only then start again with small frequency steps.
Better cooling can achieve a lot, but it is no free pass for extreme settings. Even with a stronger cooler an ASIC can reach its individual limit. Even so, good cooling makes overclocking considerably more controllable, because the miner reaches its thermal limit less quickly.
A good result here would not be more hash rate alone. A good result would be more hash rate with temperatures still under control, stable uptime and no conspicuous errors.
If you notice during tuning that the fan no longer runs at its limit permanently and the temperatures stay more relaxed, the cooling upgrade was probably the right step.
Another article on this: Making a Bitaxe quieter: how to reduce noise and improve cooling
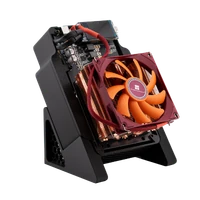
Upgrade 1: ICE Tower Low Profile kit for the Bitaxe
Upgrade 2: AXP60 Copperzilla for the Bitaxe
Example 3: unstable after overclocking
The third scenario is very common: the Bitaxe ran fine before and becomes unstable after overclocking.
That is no disaster. It only means the new setting does not suit your setup.
Typical signs are restarts, strong hash rate swings, a rising hash rate error, high temperatures, a permanently high-revving fan or a dropping pool connection. Sometimes the dashboard is briefly unreachable because the miner restarts or hangs.
In that case do not keep experimenting wildly. The first step is always to undo the last change.
If you last raised the frequency, go back one step. If you last changed the voltage, return to the last stable value. Then let the miner run again and check whether it becomes stable.
If it runs cleanly again afterwards, you know the last setting was too aggressive.
Now you can narrow down the cause. Was the ASIC temperature too high? Did the VR temperature rise conspicuously? Did the hash rate error get noticeably worse? Did the miner drop out immediately under load? Does the power supply get very warm? Are all cables seated cleanly?
Those questions matter more than the hash rate alone.
If the miner gets hot, you need better cooling or less clock. If it restarts suddenly, the power supply can be involved too. If the hash rate error rises, the clock may be too high or the voltage unsuitable.
What matters: not every problem is solved with more voltage.
More voltage can help if the ASIC is marginally unstable at a higher clock and the temperatures are still fine. But if your miner already runs hot, more voltage usually makes the problem worse.
Example 4: high hash rate but worse efficiency
The fourth scenario is a little more advanced but very important. Your Bitaxe runs at a higher clock, the hash rate has visibly risen, but the power draw is considerably higher, the temperatures climb sharply and the fan works much harder.
At first glance that looks like success. More hash rate is the goal, right?
Not always.
If a little more hash rate costs you considerably more electricity, considerably more heat and considerably more noise, the setting can be worse day to day than a slightly lower one. In home mining in particular, efficiency matters. Not only because of electricity costs but also because of stability, temperature and the life of the setup.
A good overclocking setting should not only be faster. It should be sensibly faster.
If consumption rises sharply, the temperature sits noticeably higher and the hash rate error gets worse, that is not a clean overclock. You are then running the miner closer to its limit while perhaps gaining little real performance.
In such a case a step back is often the best decision.
The best range is frequently not right at the top but a little below it. There the miner runs more stably, more coolly and more efficiently. For everyday use that is usually considerably better than an aggressive maximum setting.
Example 5: stable in winter, problematic in summer
One point many people underestimate: room temperature.
An overclocking setting that runs stably in winter can suddenly cause problems in summer. The miner has not changed, but the environment has. If the room is warmer, the cooler can dissipate less heat. The ASIC temperature rises faster, the VR temperature can go higher and the fan has to work more.
So do not treat overclocking settings as perfect forever.
If your Bitaxe becomes less stable in summer, you do not have to assume a defect straight away. It may simply be that your previous setting is too aggressive at a higher room temperature.
Then there are several sensible steps: lower the frequency a little, improve airflow, place the miner more openly, remove dust or upgrade the cooling.
With several miners next to each other the location matters especially. If one miner draws in the warm exhaust of the next, the setup gets unnecessarily hot. A little more distance or better air routing can achieve a lot here.
Example 6: several Bitaxes in the same setup
If you run several Bitaxes, overclocking becomes even more interesting but also a little more complex. It is then not only about a single miner but about the whole setup.
Several miners generate more heat. They need more electricity. And they can influence each other if they stand too close together or draw warm exhaust straight back in.
In such a setup you should test particularly cleanly. Do not overclock all the miners at once. Take one miner at a time and watch how the whole system changes.
The power supply becomes more important too. If several miners hang off a shared supply, you need enough headroom. A unit that is enough for stock operation can become too tight with several overclocked devices.
With several miners a moderate setting per device is often more sensible than an aggressive setting on individual ones. That keeps the whole setup cooler, quieter and more stable.
Here too: it is not the individual record value that counts. The whole mining setup has to run reliably.
Which temperatures matter in Bitaxe overclocking?
In Bitaxe overclocking the temperature often decides how far you can really go. More frequency and more voltage generate more heat. If that heat is not carried away cleanly, the miner becomes unstable or runs permanently too close to its limit.
So do not start paying attention to temperatures only when something goes wrong. They are part of tuning from the beginning.
What matters: do not look only at a single moment right after the start. A miner can look fine in the first few minutes and run considerably warmer after an hour. Good overclocking settings have to work not only from cold but stay stable after a longer run time.
If you see after a change that the hash rate rises but the temperature keeps climbing, that is not a good sign. You may then have more performance in the short term but no clean everyday setting.
ASIC temp: the temperature of the chip
The ASIC temp shows how warm the actual mining chip gets. That is one of the most important values in overclocking, because the ASIC is loaded directly by higher frequency and voltage.
A slightly higher temperature after tuning is normal. If the miner works harder, more heat appears. What matters is whether the temperature stays under control or keeps rising.
If the ASIC temperature sits noticeably higher after a change, be careful. It gets particularly critical if the hash rate error rises at the same time, the hash rate swings or the miner restarts.
Then the setting is probably too aggressive or the cooling is not enough.
In that case it is usually better to go back a step than to keep raising. A slightly lower clock with a stable temperature is often considerably better day to day than a hot setting that only looks good briefly.
VR temp: do not ignore the voltage regulation
Many users look almost only at the ASIC temperature when overclocking. That is a mistake.
The VR temp shows how warm the voltage regulation gets. In overclocking that value matters a great deal, because the voltage regulation has to deliver more when the ASIC runs at higher settings.
If you raise the frequency and later adjust the voltage too, it is not only the ASIC that is under more strain. The components supplying the ASIC with power work harder as well.
A high VR temp can cause instability even when the ASIC temperature still looks fine.
So in Bitaxe overclocking always watch both temperatures: ASIC temp and VR temp.
If only the chip stays cool while the voltage regulation gets hot, the setup is not really relaxed. A good overclock keeps the whole system in view, not just a single value.
Room temperature and location matter more than many think
Not every temperature problem is down to the miner itself. Often the location is the decisive point.
A Bitaxe on an open desk with free airflow usually runs considerably more relaxed than a Bitaxe in a tight shelf, right against a wall or next to other warm devices. Warm air has to get away from the miner. Fresh air has to reach the cooler.
If the miner draws in its own warm exhaust, the setup quickly gets unnecessarily hot.
Room temperature makes a big difference too. A setting that runs stably in winter can suddenly become problematic in summer. The miner is the same, but the cooling has less headroom because the surroundings are warmer.
When overclocking in particular, pay attention to simple things: the miner should stand free, have enough distance from other devices and not run in a warm corner. If several miners stand next to each other, they should not push their warm exhaust at each other.
Good cooling does not start with the cooler.
Good cooling starts with the location.
When do you need better cooling?
Better cooling is not always necessary straight away. If your Bitaxe runs stably at normal settings and you only want light tuning, the stock setup can be enough depending on the model and the environment.
But as soon as you want to run higher settings permanently, cooling quickly becomes the most important lever.
You usually notice that clearly: the ASIC temperature rises noticeably after every frequency increase. The VR temperature becomes conspicuous. The fan runs high permanently. The hash rate error rises at higher settings. Or the miner becomes unstable after a while even though it looked fine right after the start.
Those are typical signs that your setup is reaching its thermal limit.
In that case simply raising the frequency or voltage further does little. More voltage generates even more heat. If heat is already your problem, that only worsens the cause.
Then better cooling is the more sensible route.
Why cooling is often better than more voltage
When a Bitaxe becomes unstable at a higher clock, many people reach for voltage first. That is understandable but not always right.
More voltage can help if the ASIC is marginally unstable. But it also generates more heat and raises power draw. If your setup is already at its thermal limit, the miner does not get better that way – it gets hotter.
So the decisive question is:
Is the miner unstable even though the temperatures are still fine? Or is it unstable because it is getting too warm?
If the miner is still cool, a small voltage adjustment can make sense.
If the miner is hot, do not try to solve the problem with more voltage. Then you need less clock, better airflow or better cooling.
A cooler setup gives you more headroom. The miner runs more relaxed, the fan has to fight less and higher settings can be tested in a more controlled way.
Worthwhile cooling upgrades for the Bitaxe
A cooling upgrade does not always have to be complicated. Sometimes a better location, less dust, more distance from other devices or clean airflow is enough.
But if you really want to run your Bitaxe harder, better coolers and fans can be very worthwhile.
What matters is that the cooler is mounted cleanly. A large cooler does little if contact with the chip is poor or the thermal paste was not applied properly. And a good fan only helps if the warm air is really carried away.
For stronger overclocking setups, better air coolers, high-quality fans, good thermal paste and open enclosures with clean airflow are the interesting options.
Cooler: ICE Tower Low Profile kit for the Bitaxe
Copper cooler: AXP60 Copperzilla for the Bitaxe
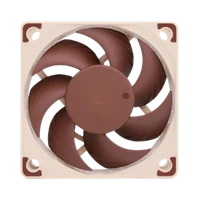
Fan: Noctua NF-A4x20 for the Bitaxe
Read on: Making a Bitaxe quieter: how to reduce noise and improve cooling
Better cooling guarantees no particular hash rate value. Every ASIC stays different. But it improves the foundation. And that is what good overclocking is about: not luck, but a clean setup.
When do you need a stronger power supply?
When overclocking a Bitaxe, many people think first of frequency, voltage and cooling. The power supply often gets attention only when the miner suddenly restarts or behaves oddly. Yet the power supply is one of the most important foundations for a stable tuning setup.
When you raise the frequency and voltage, the current draw generally rises too. The miner pulls more power, the components are under more strain and the power supply has to deliver cleanly. If it reaches its limit, problems appear that sometimes look like an overclocking fault at first glance.
A power supply that is too weak or poor can make the Bitaxe unstable under load. The hash rate can swing, the miner can restart or the connection can drop. Sometimes the miner still runs fine at stock settings but suddenly becomes unreliable after tuning.
That does not automatically mean your ASIC is bad. It may simply be that the power supply has too little headroom.
If you want to know more precisely when the standard unit is enough and when an upgrade is worthwhile, read our guide to the right power supply for a Bitaxe.
Why overclocking needs more electricity
A Bitaxe needs a certain amount of energy at stock. If you raise the frequency, the ASIC works faster. If you additionally raise the voltage, consumption rises more noticeably still.
That is normal. More performance does not come free.
What matters is that the extra demand is covered cleanly. A power supply should not run permanently at its absolute limit. In overclocking in particular, headroom matters, because load peaks and higher temperatures put more strain on the setup.
If your power supply is tightly rated, it may work in normal operation but cause problems during tuning. That is exactly why you should not check the power supply only once nothing works any more.
A good power supply does not automatically make your Bitaxe faster. But it makes sure the miner can work stably when you test higher settings.
And stability is the foundation of overclocking.
Signs of a power supply problem
A power supply problem is not always obvious straight away. Often it looks at first as though the overclocking setting is simply unstable. That can of course be the case. But if certain symptoms appear, check the power supply too.
Typical signs are restarts under load, a hash rate that suddenly collapses, dropped connections or a miner that is no longer reliably reachable after a change. If the power supply gets unusually warm, or you work with cheap adapters and long cables, that can point to a problem too.
Be particularly careful if several miners hang off a shared supply. A unit that is sufficient for a single Bitaxe can quickly become too tight with several devices or with overclocking.
Cables and connectors play a part too. A poor connection can cause problems under load even when the power supply has enough capacity on paper.
So if your Bitaxe suddenly restarts after a frequency or voltage change, do not look only at the ASIC. Also check: is the power supply strong enough? Are all connectors seated cleanly? Is an adapter getting warm? Is the cable suitable? Is a second miner running off the same supply?
Such details feel small but can make the difference during tuning.
Think about the power supply, cables and connectors
A stable power setup consists of more than the power supply itself. Cables, connectors, adapters and the ventilation of the unit belong to it too.
Cheap adapters, wobbly connections or cables that are too thin can cause voltage drops under load. That can make the miner unstable even though the problem is not directly visible in the AxeOS dashboard.
So pay attention to clean, firm connections. The connector should not wobble, cables should not be unnecessarily long or thin and adapters should not get warm. If you run several miners, the power supply should be planned properly and have enough headroom.
The power supply itself needs air too. If it lies in a warm corner or is heated by other devices, the situation gets worse still.
In home mining a tidy power setup does not only look better. It usually runs more stably too.
Read on: Which power supply for a Bitaxe? When the standard one is enough and when an upgrade pays off
Common mistakes in Bitaxe overclocking
Many problems in Bitaxe overclocking arise not from bad luck but from typical mistakes. The good news is that most of them can be avoided by going slowly and cleanly.
Overclocking is not a guessing game. It is a test process. You change one value, observe the behaviour and then decide whether the step made sense.
If instead you change several things at once or look only at the highest hash rate, it quickly becomes confusing. Then at some point you no longer know why the miner became unstable.
Too high a frequency too quickly
The most common mistake is too much at once.
You see a strong setting somewhere, copy it directly and hope your miner runs the same way. It may even start. It may briefly show a good hash rate. But after a while the errors rise, the temperatures climb or the miner restarts.
The problem is that every Bitaxe reacts a little differently. Even two miners of the same model can run differently. The individual ASIC, the cooling, the power supply and the environment make a difference.
So never copy someone else’s settings blindly.
Use them at most as rough orientation, but test your own device step by step. If you raise settings slowly, you notice far earlier where your setup reaches its limit.
Raising the voltage blindly
The second big mistake is too much faith in voltage.
More voltage can stabilise a higher clock. But it also generates more heat and raises consumption. If your miner already runs warm, more voltage is usually not the solution but part of the problem.
Many unstable settings get worse because people try to force them with voltage. That can work in the short term but makes the setup hotter, louder and less efficient.
It is better to check first why the miner becomes unstable.
If the temperatures are still fine and the hash rate error rises only at a higher frequency, a small voltage adjustment can make sense. If the ASIC temp or VR temp is already conspicuously high, lower the frequency or improve the cooling instead.
Voltage is a tool. Not a free pass.
Looking only at the hash rate
Hash rate matters. But it is not everything.
A miner with a higher hash rate can still run worse if it produces more errors, gets hotter or uses considerably more electricity. In overclocking in particular, a nice number in the dashboard can be deceptive.
So always watch the whole picture.
A good setting shows not only more hash rate. It shows a stable hash rate, controlled temperatures, an unremarkable hash rate error, stable uptime and a power draw that still makes sense relative to the extra performance.
If only one value improves and all the others get worse, that is usually not a good overclock.
Ignoring the hash rate error
The hash rate error is one of the most important warning values in Bitaxe overclocking. Even so it is often ignored, because the hash rate looks more exciting at first glance.
If the hash rate error rises noticeably after a change, react. Then the miner is no longer working cleanly. That can be down to too high a frequency, unsuitable voltage, too high a temperature, poor cooling or an unstable power supply.
A high error value does not automatically mean something is broken. But it shows you that your current setting is not optimal.
Read on: The Bitaxe hash rate error explained: what the value means and when to react
Ignoring the VR temperature
Many people look only at the ASIC temperature. That is not enough.
The voltage regulation is under load in overclocking too. If the VR temperature rises sharply, your miner can become unstable even when the chip itself does not look extremely hot yet.
So always look at the ASIC temp and the VR temp together.
If the ASIC temperature is fine but the VR temperature gets conspicuously high, that is a warning sign. Then do not simply keep overclocking but check the setup: airflow, cooler, location, power supply and load.
A good overclock does not only keep the chip alive. It keeps the whole system stable.
No long-term test
Another common mistake is too little patience.
A setting that works for five minutes is not yet a stable setting. Many problems only appear later, once the miner has warmed up or the ambient temperature rises.
So always test new settings for longer. The short test after a change is good for spotting coarse faults. For a real everyday setting, though, you need several hours of run time.
If you want to use a setting permanently, let the Bitaxe run overnight or across a whole day. Watch the hash rate, temperatures, hash rate error and uptime while you do.
Only when those values stay clean over a longer period is the setting really usable.
Overclocking or a stronger miner?
Overclocking is a good way to get more out of an existing Bitaxe. But it is not always the best solution.
If you already run a Bitaxe and your setup is stable, tuning can be very worthwhile. You learn a lot about AxeOS, temperatures, power supply, cooling and the limits of your own miner. That fits the open-source idea exactly: you do not only understand your device, you can optimise it yourself.
But overclocking has limits.
A single ASIC stays a single ASIC. With better cooling and clean settings you can get more performance out of it, but you do not turn it into a large multi-ASIC miner. If you want considerably more hash rate permanently, a stronger model is sometimes the better decision.
Then it is not about pushing a Bitaxe to its limit but about working with more hardware power directly.
When overclocking makes sense
Overclocking makes sense if you want to get to know your existing Bitaxe better and optimise it moderately.
If your miner runs stably, the temperatures look good and you enjoy tuning, overclocking is a logical next step. You can test how your ASIC reacts, how much headroom your cooling offers and how small changes affect hash rate, temperature and consumption.
Overclocking is particularly sensible if you already have a clean setup: an open location, good air circulation, a stable power supply and no conspicuous errors at stock.
Then you can work in small steps and find out where your personal sweet spot lies.
For many users that is the most interesting part of home mining. Not simply plugging in a device but understanding how your own setup works.
So overclocking suits you particularly well if you are looking not only for maximum performance but to learn, test and optimise.
When a stronger miner makes more sense
A stronger miner makes more sense if you want considerably more hash rate permanently and do not want to squeeze every percent out of a single ASIC.
If you notice that your Bitaxe quickly reaches temperature, power supply or stability limits during tuning, upgrading to a more powerful model can be cleaner. Instead of running a single miner aggressively, you then use more ASIC power or a device designed for more hash rate from the start.
That can make sense above all if you want to experiment less. Not everyone wants to watch frequency, voltage and temperatures constantly. Some users simply want a stronger, stable setup.
A Bitaxe GT, NerdQaxe or NerdOctaxe can then be the better next step. Not because overclocking is bad but because more hardware power is often more relaxed than a permanently aggressive overclock.
Overclocking is tuning.
A stronger miner is an upgrade.
Both can make sense. It depends on what you want to achieve.
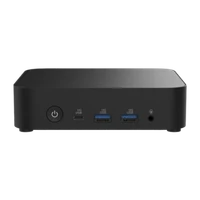
More hash rate: Bitaxe GT
More hash rate: NerdQaxe++
More hash rate: NerdOctaxe
Is Bitaxe overclocking worth it?
Whether Bitaxe overclocking is worth it depends heavily on what you mean by „worth it“.
If you expect overclocking to make your miner predictably profitable, that is the wrong expectation. A Bitaxe is an open-source home miner. It is not an industrial farm ASIC and not a promise of returns.
Bitcoin mining at home is different. It is about sovereignty, understanding, decentralised hash rate, technology and the enjoyment of taking part in the network yourself.
Overclocking can be an interesting part of that, because you get to know your setup better and can get more out of your hardware. But it should not be understood as a safe profit calculation.
Do not treat it as a promise of returns
More hash rate sounds like more chance. Technically that is true. But in solo mining and home mining you should still stay realistic.
A small miner stays a small miner. Overclocking may improve your setup, but it guarantees no block find, no profit and no predictable return.
On top of that, overclocking usually raises power draw too. If a little more hash rate needs considerably more energy, efficiency can get worse. Then the higher number in the dashboard is not automatically a better result.
So look at overclocking soberly in financial terms.
It can make sense if you want to optimise your device. But it is no trick for turning home mining into a safe income.
Anyone promising you that is usually selling hope.
Technically and practically it can pay off
Technically, overclocking can certainly pay off.
You learn how your Bitaxe reacts. You understand better what role cooling, the power supply, voltage and the location play. You see how small changes can have big effects. And you may find a setting that delivers a little more hash rate without straining your setup unnecessarily.
For users who enjoy technology in particular, that is worth a lot.
A well-tuned Bitaxe does not simply run faster. It runs more deliberately. You know its values, its limits and its strengths. You know when more clock makes sense and when it is better to take a step back.
That is exactly the point where open-source mining becomes interesting.
Not consuming blindly.
Understanding. Testing. Improving.
Conclusion: more hash rate only with a stable setup
Bitaxe overclocking can be genuinely enjoyable. It shows why open-source Bitcoin mining is so interesting: you can not only run your device but really understand it and adapt it to your own setup.
But overclocking is no magic trick.
More hash rate does not simply appear by turning up frequency and voltage. A good overclock needs a stable basic setup, clean cooling, a suitable power supply and patience while testing.
The most important rule remains: stable first, faster second.
If your Bitaxe already has problems at stock, do not overclock. Solve the cause first. If your miner runs stably, you can work your way forward step by step and watch how your device reacts.
The best Bitaxe overclock is not the highest screenshot value.
The best overclock is a miner that runs stably, is cooled cleanly and works reliably over time.
Every hash counts.
FAQ about Bitaxe overclocking
Can you overclock a Bitaxe?
What matters, though: overclocking should always happen in a controlled way. Do not simply copy someone else’s settings or enter maximum values straight away. Every Bitaxe reacts a little differently. Cooling, the power supply, room temperature and the individual ASIC make a big difference.
If you want to overclock your Bitaxe, always start from a stable stock setup and work your way up slowly.
How much extra hash rate does Bitaxe overclocking bring?
It also matters how you judge „more hash rate“. A brief peak in the dashboard is not the same as a stable average over several hours.
A good overclocking result is not simply the highest number. A good result is more stable hash rate with controlled temperatures, an unremarkable hash rate error and clean uptime.
Do I need better cooling for overclocking?
But as soon as you want to run higher settings permanently, cooling becomes very important. If the ASIC temp or VR temp rises sharply, the fan runs high permanently or the miner becomes unstable after a longer run time, better cooling is usually the more sensible route.
More voltage is then often the wrong solution, because it generates even more heat. Better cooling gives you more headroom and makes tuning more controllable.
When do I need a stronger power supply?
Overclocking raises the current demand. A unit that still works at stock can become too tight during tuning.
A good power supply does not automatically make your Bitaxe faster. But it makes sure your miner can work stably when you test higher settings.
Maximum hash rate or stable efficiency?
Maximum hash rate looks good, but it does little if the miner runs hot, produces errors or restarts regularly. A slightly lower setting can be better day to day if it runs cooler, quieter, more stably and more economically.
Bitaxe overclocking is not about pushing the miner to its limit for a screenshot. It is about finding a setting that suits your setup over time.
Is overclocking dangerous for the Bitaxe?
That does not mean every overclock is automatically dangerous. If you test slowly, watch temperatures, take the hash rate error seriously and do not raise voltage blindly, you can optimise your setup in a controlled way.
The most important rule is: if your miner gets hot, produces errors or restarts, go back a step. Do not force a setting your setup obviously cannot keep clean.
Which values should I watch in AxeOS?
The hash rate shows performance. The hash rate error shows whether the miner works cleanly or produces too many errors. ASIC temp and VR temp show whether the chip and the voltage regulation stay within thermal reason. Fan speed shows how hard the cooling has to work. Power shows consumption. Uptime shows whether the miner really runs stably.
You recognise a good setting by those values fitting together. If only the hash rate rises while all the others get worse, that is usually not good tuning.
Why does my Bitaxe become unstable?
High VR temperatures, poor cables, wobbly adapters or an unfavourable location can cause problems too. Sometimes the ambient temperature is the trigger. A setting that was stable in winter can suddenly run too warm in summer.
If your Bitaxe becomes unstable after tuning, first undo the last change. Then check temperatures, the hash rate error, the power supply, cables and airflow. That finds the cause far faster than simply changing more values.
Should I copy someone else’s settings?
Someone else’s settings can be rough orientation, but they are no guarantee. Every Bitaxe is a little different. Even two miners of the same model can react differently to frequency and voltage.
Add to that differences in cooling, power supply, location, room temperature and firmware version. A setting that runs stably for someone else can be too hot, unstable or inefficient for you.
Use other people’s settings as inspiration at most. Always test your own setup step by step.
Can overclocking affect the lifespan?
So do not understand overclocking as „everything to maximum“. Sensible tuning means running the miner in a controlled way and respecting the limits of your setup.
The cooler, more stably and more cleanly your Bitaxe runs, the better the basis for long-term operation.
What your setup needs for overclocking
If you want to overclock your Bitaxe, the whole setup matters. More hash rate does not come only from higher values in AxeOS. Cooling, power supply, airflow and a clean build are decisive too.
For light tuning a good standard setup is often enough. But if you want to test more performance permanently, upgrades can be very worthwhile.
Better coolers, high-quality fans, good thermal paste, a stronger power supply and an open enclosure with clean airflow are particularly interesting. If you want considerably more hash rate permanently, a stronger miner such as a Bitaxe GT, NerdQaxe or NerdOctaxe can be the better next step.
If you want to extend your setup further, you can connect your Bitaxe to your own Bitcoin node and use Public Pool on Umbrel.
Overclocking works best when the setup as a whole is right. A good cooler, a clean power supply and a stable location often matter more than the next aggressive clock value.
Want to get more out of your Bitaxe setup? If you want to run your Bitaxe more stably, more coolly or with more performance, you will find the matching upgrades here: better cooling, high-quality fans, strong power supplies and, of course, miners for everyone who wants more hash rate straight away.
Read more
Finding a block with a Bitaxe: what are the odds, really?
Every ten minutes the Bitcoin network raffles off 3.125 BTC – and your Bitaxe automatically plays along. Here is the honest math: the odds per block and per year for every device, the lottery comparison, and what exactly happens if you actually hit.
Bitcoin miningSolo mining with a Bitaxe: how Bitcoin solo mining works at home
Solo mining is one of the most fascinating areas of Bitcoin mining. Instead of working alongside thousands of other miners in a pool, you try to find a valid block yourself.
Guides & knowledgeBuying a Bitcoin miner: Bitaxe, NerdAxe and full-node setups for home
Want to buy a Bitcoin miner without putting a loud black box in your home? This guide shows when a Bitaxe Gamma, NerdAxe/NerdQaxe, NerdOctaxe or a full-node setup makes sense – with realistic expectations.