
Bitaxe setup: step by step to your first share
From unboxing to your first hashrate in about ten minutes: setup Wi-Fi, home Wi-Fi, pool and your own Bitcoin address in AxeOS 2.15. With real screenshots, normal values and help when something goes wrong.
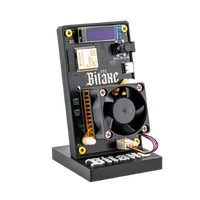
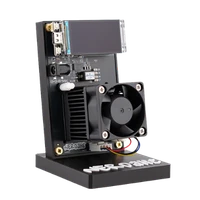
This guide takes you from unboxing to your first hashrate. It applies to every Bitaxe running AxeOS: the Bitaxe Gamma 601 (also in revisions 602 and 603), the Copperzilla, the Bitaxe GT 801 and the Supra Hex 702. Everything specific to the Gamma, with normal values, revisions and reset, is in Bitaxe Gamma 601 setup. All screenshots show AxeOS 2.15, the current firmware. Nerdaxe and NerdQaxe have a differently built interface; they have their own guides for the Nerdaxe Gamma and the NerdQaxe++.
Bitaxe_XXXX, enter your 2.4 GHz Wi-Fi, Save and Restart. Then open http://bitaxe.local or the IP from the display, under Pool enter host stratum.bitaxe.de, port 3333 and your own Bitcoin address as user, Save and Restart. After one or two minutes the dashboard shows the hashrate. Have these ready:
- The Bitaxe and the power supply that came with it (Gamma and Copperzilla: 5 V at 6 A, GT 801 and Supra Hex 702: 12 V).
- Name and password of your Wi-Fi in the 2.4 GHz band. The ESP32 chip in the Bitaxe cannot receive 5 GHz networks.
- A Bitcoin address from your own wallet whose keys you hold. No Lightning address.
- A phone or laptop with Wi-Fi for the first setup.
Preparation
Five minutes before the power goes on
Unpack and check
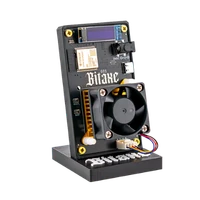
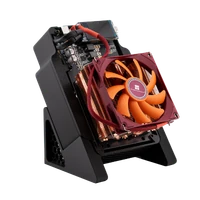
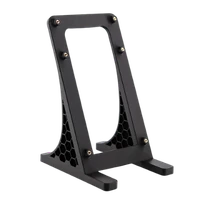
The Bitaxe Gamma box contains the miner with heatsink and fan, a stand, the power supply and an info flyer. Check that the fan can spin freely, the heatsink sits firmly and cables and plugs are undamaged. The small display is only plugged on; that is intended. If something is missing or damaged, do not connect the miner and write to our support.
Choose the right spot
A firm, level surface with at least 10 cm of space at the air intake and outlet, not in a closed cabinet and not in direct sun. Good Wi-Fi reception matters: the stronger the signal, the less often the connection to the pool drops. The fan is audible; how to change that is covered in making a Bitaxe quieter.
Only the right power supply
Use the power supply that came with the miner. Gamma and Copperzilla need 5 V at no less than 6 A through the round barrel plug, GT 801 and Supra Hex 702 run on 12 V. The USB-C port is only for flashing and does not power the miner. A weak power supply is the most common cause of restarts under load; details in power supply for the Bitaxe.
Connect power
First push the plug straight into the power socket on the miner, then plug the power supply into the wall. After one or two seconds display and fan start. Do not hold any button on the board while doing this: with the BOOT button held, the chip starts in service mode or in a self-test.
Check the display
A new Bitaxe greets you with “Welcome to your new Bitaxe!” and shows the name of its setup Wi-Fi under “Setup Wi-Fi”, for example Bitaxe_2215, on larger displays also a QR code. The four characters after the underscore differ on every device. If the display stays dark, check plug and socket.
Quick start in five steps
For everyone who has set up a Bitaxe before
Join the open Wi-Fi Bitaxe_XXXX. The setup page opens by itself, otherwise open http://192.168.4.1.
Enter your 2.4 GHz Wi-Fi under Wi-Fi SSID and Wi-Fi Password, Save, Restart.
Open http://bitaxe.local or the IP address from the display in your browser.
Under Pool, in Pool 1: Stratum Host stratum.bitaxe.de, port 3333, user your Bitcoin address (optionally with .name after it), password x, Save, Restart. The pool configurator gives you ready-made values.
Check the dashboard: hashrate close to “Expected”, shares rising, ASIC temperature around 60 °C.
Connect Wi-Fi
Open the Wi-Fi settings on your phone or laptop and pick the open network Bitaxe_XXXX with the four characters from your display. No password is needed. If your display shows a QR code, you can scan it with the phone camera instead.
After a few seconds the setup page opens by itself (captive portal). If nothing happens, open the browser and go to http://192.168.4.1. If your phone asks whether to stay on a Wi-Fi without internet, confirm.
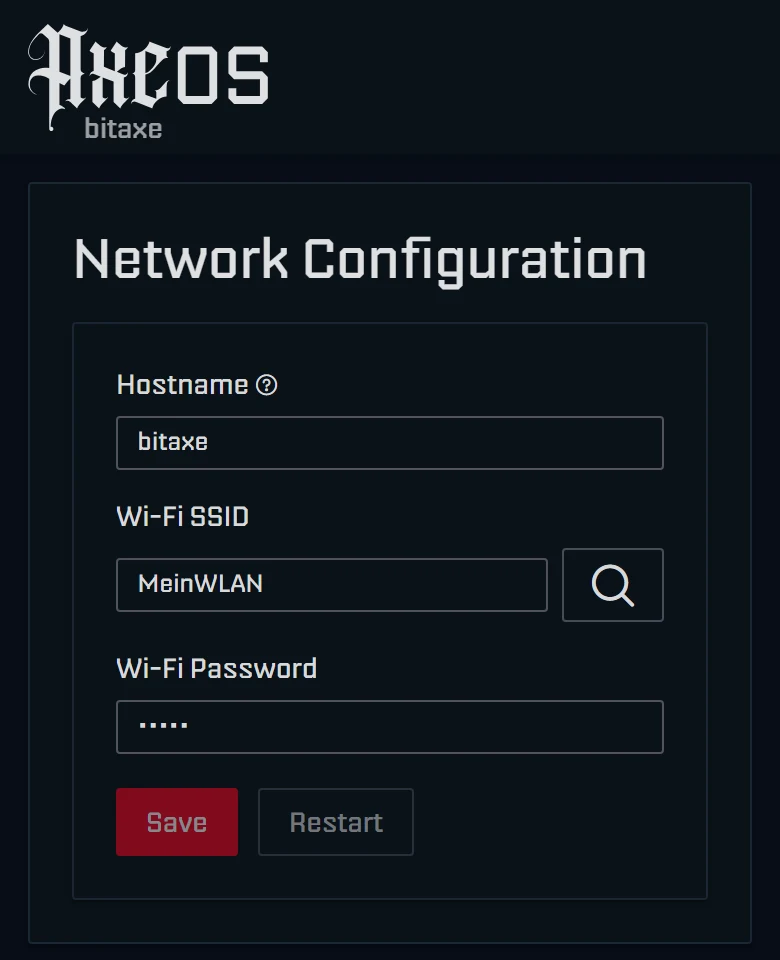
Hostname is the miner’s name on your network. Keep bitaxe or, with several devices, give unique names such as bitaxe-office. Under that name you later reach the miner as http://bitaxe.local. Devices with OSM-OS show OSM-Miner there by default.
Under Wi-Fi SSID enter the name of your Wi-Fi. The magnifier next to it scans for networks in range. It does not list networks with a very weak signal (weaker than −80 dBm) or hidden networks; type those in by hand. Mind upper and lower case.
Enter the Wi-Fi password under Wi-Fi Password. An open network without a password works as well.
Tap Save and then Restart. After saving, AxeOS itself reports that a restart is needed.
The Bitaxe restarts and joins your Wi-Fi. The setup Wi-Fi disappears and your phone returns to your normal network. The display now shows the miner’s IP address, for example 192.168.178.57.
If the connection fails, it is almost always the Wi-Fi itself: a pure 5 GHz network, a typo in the password, client isolation in a guest network or a signal that is too weak. The fixes are in the “Solving problems” chapter below. As long as the miner finds no Wi-Fi, the setup Wi-Fi stays active, so you can correct the data at any time. Routers in mixed WPA2/WPA3 mode work reliably since AxeOS 2.15.1.
New since AxeOS 2.15: when the miner finds no Wi-Fi, it also announces itself over Bluetooth as Bitaxe-XXXX. A suitable app can send Wi-Fi and pool data that way. There is no official app for it yet, so we describe the route via the setup Wi-Fi, which always works.
Pool and Bitcoin address
The pool hands out the work to your miner and receives its results. We recommend our solo pool pool.bitaxe.de: 0 % fee, server in Frankfurt, no account needed, and if your Bitaxe finds a block, the reward goes straight to your address. The pool configurator creates the values to copy. Which other pools exist and when they make sense is covered in choosing a mining pool.
In the browser of a device on the same Wi-Fi, open http://bitaxe.local or the IP address from the display, for example http://192.168.178.57. The AxeOS dashboard appears. If your device does not know .local names, which happens on some Android phones, use the IP address.
Click Pool in the left menu. At the top is “Active Pool Selection” with Primary Pool and Fallback Pool, below that the individual pool entries.
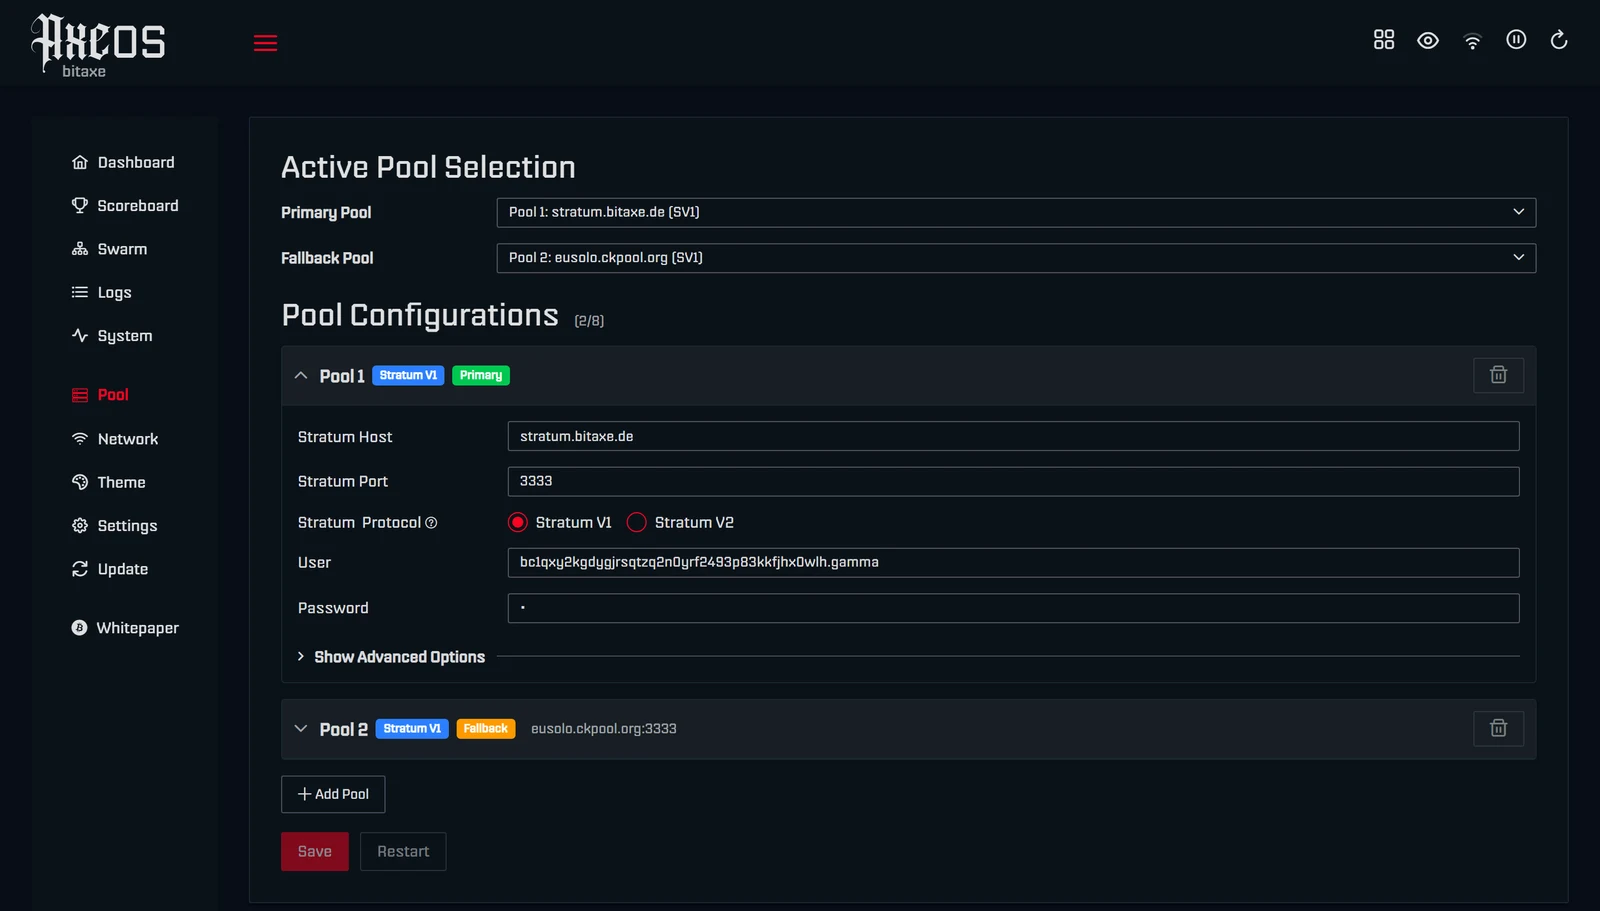
Expand Pool 1, marked “Primary”. Under Stratum Host enter stratum.bitaxe.de, just the name, without stratum+tcp:// and without a port. If you paste a full address such as stratum+tcp://stratum.bitaxe.de:3333, AxeOS splits it into host and port itself.
Stratum Port is 3333, and Stratum Protocol stays on “Stratum V1”.
The User field already contains an entry. Delete it completely and enter your own Bitcoin address without spaces. Optionally append a device name after a dot, for example bc1q…your-address.gamma. With several miners you can then tell them apart in the pool.
Enter x under Password. Our pool does not evaluate this field.
Pool 2 is set up as the fallback out of the box, usually with solo.ckpool.org and also with a foreign address. It steps in when the first pool cannot be reached. Enter your own address there as well, otherwise the miner would work for another address in an emergency.
Click Save and then Restart. The miner only connects to the new pool after the restart.
Our pool also speaks the encrypted Stratum V2 protocol on port 3336. Stratum V1 is enough to start; how to switch and why you might want to is shown in setting up Stratum V2.
Start and check
After the restart the miner needs one or two minutes until all values settle. Then open the dashboard again. The four most important figures are at the top.

The Hashrate should be close to “Expected”. AxeOS calculates that value from clock and chip count: about 1.07 TH/s on the Gamma, about 2.14 TH/s on the GT 801, about 3.75 TH/s on the Supra Hex 702. Short-term fluctuation is normal; the “1h” average is what counts.
The Error value next to it shows the share of faulty hashes reported by the chip. A few errors every few seconds are normal. If it rises clearly, something is off with clock, voltage or power supply; more in hashrate error on the Bitaxe.
Under Shares the number must keep rising. Individual rejected shares (“Above target”, “Stale”) are normal as long as they stay well below one percent.
Further down, the Power and Heat cards show power, input voltage, clock, ASIC temperature and the temperature of the voltage regulator.
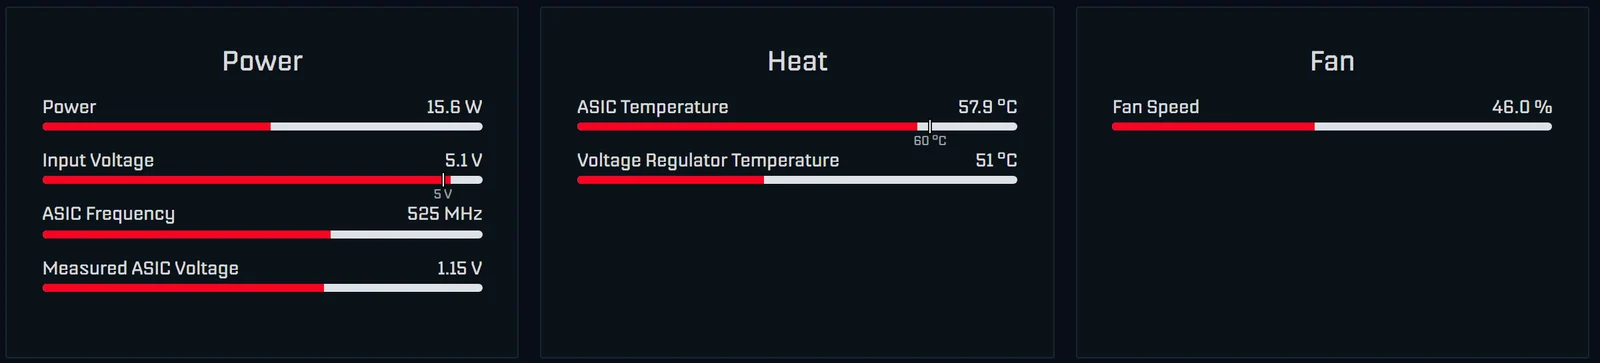
Automatic fan control keeps the chip at 60 °C by default. From 70 °C AxeOS shows a warning. Above 75 °C on the chip or 105 °C on the voltage regulator, the overheat protection stops mining, waits at least 30 seconds and restarts with 100 MHz less clock and 100 mV less voltage. Input Voltage should be close to the nominal value, 5 V on the Gamma and 12 V on GT and Supra Hex; if it drops noticeably, AxeOS warns with “Danger: Low Voltage”. By the way, on the Gamma the power shown is an estimate from the voltage regulator plus a 5 W allowance, not a reading at the wall.
| Readout | Normal | Act when |
|---|---|---|
| Hashrate (1h) | close to Expected | more than 10 % below for a long time |
| Error | low, individual errors | clearly higher than usual |
| Shares | rising steadily | stuck at zero or more than 1 % rejected |
| ASIC Temperature | around 60 °C | above 70 °C (warning) or 75 °C (protection) |
| Voltage Regulator Temperature | well below 100 °C | above 105 °C (protection) |
| Input Voltage | close to 5 V or 12 V | “Danger: Low Voltage” warning |
Check in the pool: on pool.bitaxe.de enter your Bitcoin address in the search field. After a few minutes your miner shows up there with its hashrate.
If everything runs, the setup is done. What each readout means is explained in AxeOS explained. How high your chance of a block is, is shown in finding a block with a Bitaxe, and the mining calculator works out the running cost. Only push for more hashrate once everything is stable; how is in the overclocking guide.
Keep the firmware current
Your Bitaxe ships with a current AxeOS version. New versions bring fixes and features; an update is only needed when a change affects you. The installed version is shown under Update in the menu. The two routes are summarised here; the full version with all special cases is in the firmware update guide.
Method A: update with flasher.bitaxe.de (recommended)
• Open flasher.bitaxe.de in Chrome, Edge or Opera on desktop.
• Click your device’s tile. OSM-OS (optimized) is preselected and our recommendation; if you want the unmodified releases, choose AxeOS original.
• Leave “Keep configuration” ticked. Wi-Fi, pool and Bitcoin address are then kept.
• Click “Install firmware” and pick the serial port in the browser dialog (depending on the board “USB JTAG/serial”, “CP210x” or “CH340”).
• Wait until the bar reaches 100 %. The miner restarts and is back on the network after about 30 seconds.
Firefox and Safari cannot flash over serial; there you use method B.
Method B: update in the dashboard
• Next to “Latest Release” click Check and confirm the github.com notice with “Continue”. AxeOS shows the newest version and a download link for
esp-miner.bin. If you use OSM-OS, download the file from the current OSM-OS release instead.• In the Update Firmware card click “Browse” and choose
esp-miner.bin. Since AxeOS 2.15 this is the only file; the web interface is inside it.• Wait about a minute until the miner has restarted, then reload the page.
If you do not like the new version, switch back under “Installed Firmware” with “Activate”.
Solving problems and FAQ
The most common problems and their fixes are below. Faster still is the miner troubleshooter, which leads you to the cause in a few clicks. If your miner joins the Wi-Fi but does not hash, see Bitaxe not mining despite Wi-Fi. And if you get stuck, write to our support with your order number and a screenshot of the dashboard.
The Wi-Fi “Bitaxe_XXXX” does not appear.
• Move your phone or laptop closer to the miner (two to three metres) and scan again.
• If the miner already has a Wi-Fi stored, it tries that first; the setup Wi-Fi is still active as long as there is no connection. You can also switch it on and off by pressing the BOOT button for two seconds.
• If nothing helps, briefly disconnect and reconnect the power supply.
The setup page does not open automatically.
http://192.168.4.1 while you are connected to Bitaxe_XXXX.• Turn off mobile data on the phone for a moment so it does not fall back to the mobile network.
My Bitaxe does not find my Wi-Fi or does not connect.
• The scan only lists networks with enough signal (stronger than −80 dBm) and no hidden networks. Move the miner closer to the router or type the name in by hand.
• In a guest network, communication between devices must be allowed (turn off settings called “AP/client isolation” or “intra-BSS blocking”).
• Routers in mixed WPA2/WPA3 mode need at least AxeOS 2.15.1. Company Wi-Fi with a login (WPA2-Enterprise) is not supported.
The Wi-Fi password is reported as wrong.
• Mind upper and lower case and trailing spaces; the eye icon shows the password while you type.
• Join
Bitaxe_XXXX again and re-enter the password. After the Wi-Fi setup I cannot find the Bitaxe any more.
• Try
http://bitaxe.local in the browser, with OSM-OS http://osm-miner.local, or look for the hostname in your router’s device list.• Your phone or laptop must be on the same Wi-Fi as the miner, no longer on the setup Wi-Fi.
The connection with iPhone or Mac drops during setup.
Bitaxe_XXXX manually until the setup is saved.• On the iPhone temporarily turn off “Wi-Fi Assist” under Settings → Mobile Data.
• On the Mac briefly disable automatic joining of other known networks.
A yellow warning is shown at the top of the pool page.
No hashrate is shown after the start.
stratum.bitaxe.de without stratum+tcp://, port 3333, User with your address, then Save and Restart.• If the miner cannot reach any of the configured pools, AxeOS pauses mining, sets the fan to 30 % and retries every 30 seconds. That saves power, but it means: no pool, no hashrate.
• The pool configurator gives you values to compare; if the hashrate stays at zero, the miner troubleshooter helps.
The Bitaxe gets too hot or the display shows “DEVICE OVERHEAT!”.
• Under Settings set Frequency and Core Voltage back to the factory values (Gamma: 525 MHz and 1150 mV), click “Disable Overheat Mode” and switch “Automatic Fan Control” back on.
• Check the location: more space, a cooler room, remove dust. Only raise the values carefully once the chip stays below 65 °C.
The connection to the pool keeps dropping.
• Place the miner where the signal is strong, with few walls, metal or water in between.
• Connect the miner to the main Wi-Fi instead of a repeater.
The dashboard does not load or times out.
• Test with the browser’s ad blocker or tracking protection turned off, such as the “Shields” in Brave, or use a different browser.
• After a firmware update clear the browser cache so no old interface is loaded.
How do I change my Wi-Fi later?
• If the old Wi-Fi is already gone, the miner opens its setup Wi-Fi
Bitaxe_XXXX again by itself. Alternatively switch it on by pressing the BOOT button for two seconds. How do I reset the Bitaxe to factory settings?
• Afterwards the miner is in its delivery state; Wi-Fi, pool and address are erased. Note them down first.
• Your data at the pool is not affected; a solo pool has no account anyway.
Safety, power and location
Location
- Firm, level surface with air all around, not on carpet or fabric.
- No moisture and no heat sources nearby, out of reach of children and pets.
- Summer gets warmer: the same setting that runs calmly in winter can reach the temperature limit at 28 °C room temperature.
Power supply
- Only use the supplied power supply or an equivalent one with enough current.
- Insert the plug straight, do not kink the cable or put it under strain.
- Disconnect the power before moving or cleaning the miner.
Network and access
- The dashboard has no password. Every device on your Wi-Fi can change settings. If you do not want that, give the miner its own Wi-Fi, such as a guest network that is allowed to talk to your home network.
- AxeOS only answers requests from private network ranges. Do not expose the miner to the internet with port forwarding.
- Only install firmware from known sources, easiest via flasher.bitaxe.de.
Operation and care
- Check the temperatures in the dashboard now and then, especially after moving the miner and in summer.
- Remove dust from fan and heatsink and keep the airways clear.
- Only set overclocked values once the miner has run stably on factory values for several days.
Tools for the setup
Help after the setup
After the first start these topics matter most for stable operation, pool choice and optimisation.
Products for your Bitaxe setup
If you want to pick hardware or accessories after the guide, these are the next steps.