
Making a Bitaxe quieter: fan control, Noctua fan and cooler upgrades
11 April 2026 · 17 min read · Updated on 26 September 2026

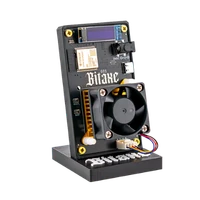
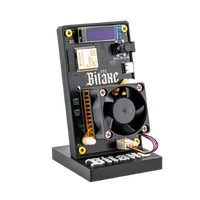
In a quiet room, the only thing you usually notice about a Bitaxe is its fan. The Gamma carries a 40 mm fan that has to pull around 17 W of heat off the heatsink, and a small fan can only do that at high speed. So a miner does not get quieter by simply slowing the fan down. It gets quieter when less heat is produced, when that heat is shed over more surface, and when the fan is therefore allowed to spin slower. This article goes through the levers in the order in which they help most, with the settings from AxeOS 2.15 and NerdOS 1.1 and with measurements instead of datasheet figures. First, though, the most common reason a Bitaxe suddenly gets loud: the overheat protection, which sets the fan to 100 % and leaves it there.
How loud is a Bitaxe Gamma?
Clean measurements of a miner with a 40 mm fan are rare. The best one we found comes from draeger-it.blog: a Bitaxe Gamma 601, microphone pointed straight at the device from 5 cm, ten readings each, once with the stock fan and once after swapping in a Noctua.
| Setup | Level at 5 cm | Note |
|---|---|---|
| Gamma 601 with stock fan (5,200 rpm) | 41.8 dB on average | ten readings between 40.8 and 42.8 dB |
| Gamma 601 with Noctua NF-A4x20 5V PWM | 30 dB | lowest value the meter shows, the real level may be lower |
Source: draeger-it.blog, March 2025 (German). At least around 12 dB less is a clear difference; as a rule of thumb, the ear perceives 10 dB less as roughly half as loud. Two things help to put this in context. First, 5 cm is very close, and from your desk chair it is considerably quieter, so figures like these are only good for comparisons under the same conditions. Second, the 14.9 dB(A) figure in the Noctua datasheet describes the fan on its own at full speed, measured with the manufacturer's method. They say nothing about how loud a miner on your desk is.
How fast the fan spins depends on the heat it has to remove. In a retailer's test series with a Gamma on a larger aftermarket cooler (distance not stated), the level rose with the clock: 43 dB at 44 % fan at factory settings, 46 dB at 59 % with 625 MHz and 1250 mV, 49 dB at 68 % with 750 MHz at the same voltage. The reverse holds too: less heat means lower fan speed and therefore less noise.
Fan suddenly stuck at 100 %? Check the overheat protection first
If a Bitaxe that ran quietly for months suddenly only runs at full speed, the fan is rarely the problem. Usually the AxeOS overheat protection has tripped, and it leaves the fan at 100 % even after everything has cooled down. This is how the protection works in AxeOS 2.15.3, checked in the firmware source code:
- The chip gets hotter than 75 °C or the voltage regulator hotter than 105 °C. From 70 °C at the chip the dashboard only shows the warning “Danger: High Temperature” beforehand.
- AxeOS stops mining, switches off “Automatic Fan Control” and sets the fan to a fixed 100 %. The dashboard reports “Device has overheated - See settings”, the display “DEVICE OVERHEAT!”.
- After at least 30 seconds, and once the regulator is below 95 °C, the miner resumes with 100 MHz less clock and 100 mV less voltage. AxeOS saves these values permanently, and every further trip lowers them again.
- The message goes away, but automatic control stays off. The fan keeps running at 100 % until you switch it back on yourself.
You can recognise this on the Settings page: “Automatic Fan Control” is unticked, and below it “Fan Speed” is at 100 % with the label “S19 Simulator”, a developer joke. On a Gamma that ran at factory settings, Frequency and Core Voltage now read “425 (Custom)” and “1050 (Custom)” instead of 525 and 1150. If the event was recent, you will also find it on the Logs page by filtering for “OVERHEAT”. To clean up:
- Fix the cause: placement, dust in the heatsink, room temperature, a fan that no longer spins properly, or too much clock.
- In Settings, set Frequency and Core Voltage back to your values; on a Gamma at factory settings these are the entries “525 (Default)” and “1150 (Default)”.
- Tick “Automatic Fan Control” again, check the Target Temperature and click Save. No restart is needed.
- If you still see the red “Disable Overheat Mode” button, click it only now. AxeOS itself reminds you to reset clock and voltage first.
There are other reasons for a conspicuous fan as well. The table sorts them out:
| What you see | Cause | What to do |
|---|---|---|
| Fan 100 %, “Automatic Fan Control” off, clock and voltage marked “(Custom)” | The overheat protection has tripped | Steps above |
| Fan 100 %, automatic control on, chip still above the target temperature | The cooling cannot reach the target: warm room, dust, poorly seated heatsink or too much clock | Check placement, cooler and clock (steps 2 to 5) |
| Fan 70 % right after start-up | Start-up phase until the first valid temperature reading arrives | Nothing, control takes over as soon as the chip is hashing |
| Fan 30 %, hashrate 0 | Mining paused (“Mining is paused”) or no pool reachable | Resume, or check the pool details |
| NerdOS: fan at 100 % from the very first start | Stock NerdOS ships set to “Manual” at 100 % | Switch to “Auto Fan Control (PID)” (see NerdOS below) |
| NerdOS: fan 100 %, display shows “MINER OVERHEATED” or “VREG OVERHEATED” | Shutdown temperature reached, chips switched off | Fix the cause, then restart |
Step 1: set up fan control in AxeOS
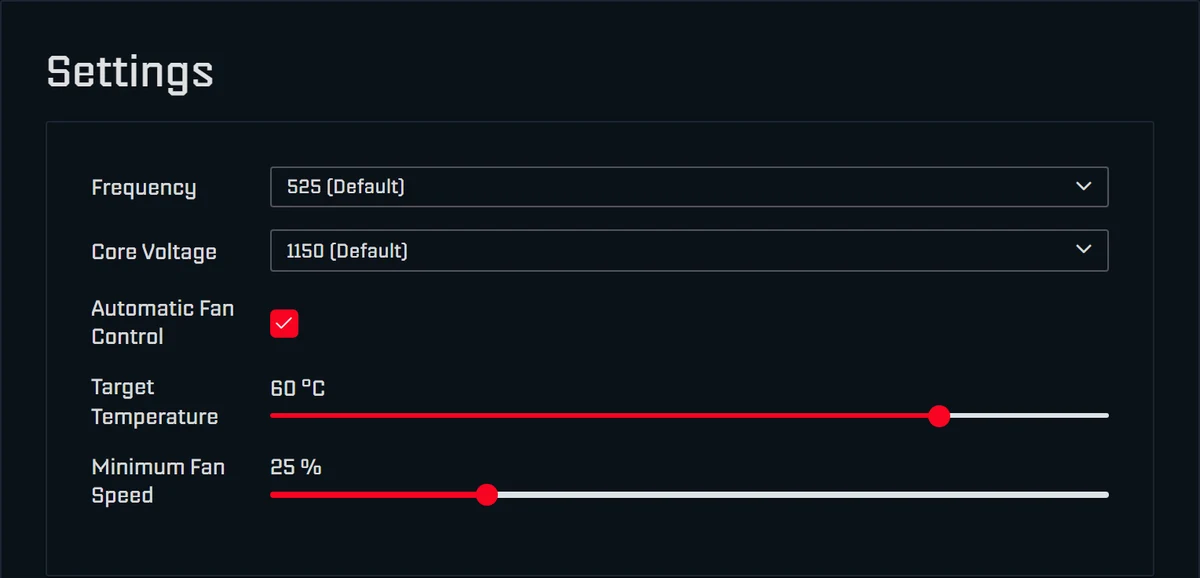
Out of the box, “Automatic Fan Control” drives the fan so that the chip stays at the “Target Temperature” of 60 °C. Behind it is a PID controller: it compares the smoothed chip temperature (the higher one if there are two sensors) with the target and sets the fan speed between “Minimum Fan Speed” and 100 %. You find all values on the Settings page; they apply immediately after Save, without a restart. The remaining fields are explained in AxeOS explained.
- Target Temperature (35 to 66 °C, 60 °C out of the box): the most important control for noise. At 62 to 65 °C the chip may run a little warmer and the fan spins slower. Going higher does not pay off: from 70 °C the dashboard warns, above 75 °C the protection trips, and 65 °C at the chip is a good guideline for continuous operation.
- Minimum Fan Speed (0 to 99 %, 25 % out of the box): the speed the fan never drops below. It only matters when the chip stays below the target even at that speed, for example in a cool room or with lowered voltage. Lower it only in small steps and check the voltage regulator afterwards, because the control loop only looks at the chip.
- Fan Speed (only without automatic control): a fixed speed that ignores the temperature. Below 33 % AxeOS warns with “Danger: Could Cause Overheating”. Not for everyday use, but handy for a listening test (see step 4).
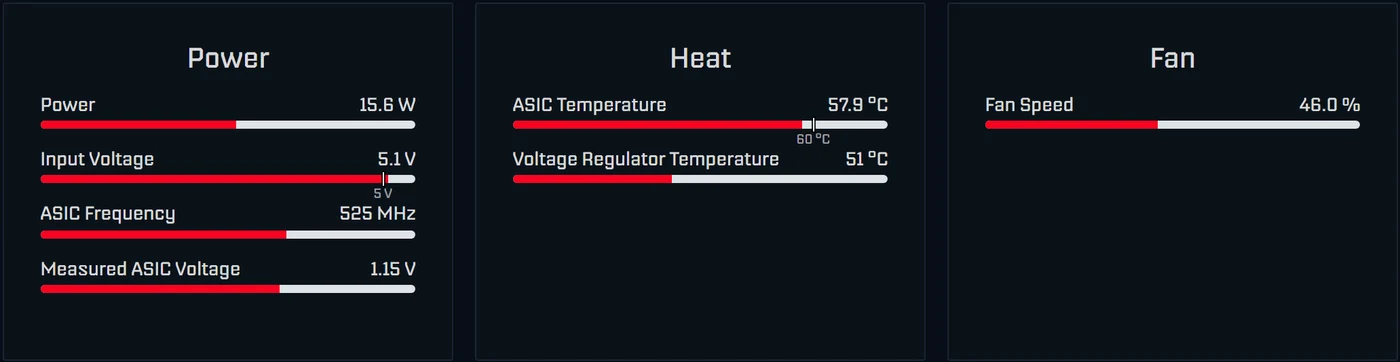
The dashboard tells you whether the setting works. In the Heat card, AxeOS 2.15 marks the target temperature on the “ASIC Temperature” bar, with the “Voltage Regulator Temperature” below it. The Fan card shows the speed in percent and, when you hover over it, in rpm. Give the controller half an hour after every change, then compare fan percentage, chip and regulator temperature. The field names apply to AxeOS 2.15, currently 2.15.3. The easiest way to update older versions is flasher.bitaxe.de, where OSM-OS is preselected; with “Keep configuration” your Wi-Fi and pool settings stay in place. The steps are in the update guide.
Step 2: placement, room temperature and surface
With automatic control on, every degree of room temperature ends up in the fan speed first: the controller holds the chip at the target and spins the fan faster to do so. A setting you barely notice in a cool winter room can be clearly louder in high summer. Only once the fan is already at 100 % does the chip temperature keep rising. Bitaxe developer Skot puts it briefly: if your fan is already at 100 %, the only way to lower the temperature is to underclock, and room temperature has a large effect on the operating temperature (discussion 892).
- Free-standing: not in a closed shelf compartment or cabinet, where warm exhaust air builds up and is drawn back in. The fan needs unobstructed intake air.
- Away from heat sources: not above a radiator, not in the sun and not right next to other warm devices.
- Distance to your ears: sound pressure falls with distance, in open space by about 6 dB per doubling of distance, a little less in a room because of reflections. A miner on the shelf across the room is therefore quieter than one next to your keyboard. Moving it from the bedroom to the study often solves the problem without any new parts.
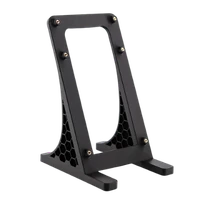
- Decouple the surface: if the miner sits directly on a desk top, the desk can pass on the fan's vibrations as a hum. Put the miner in the 3D-printed stand that comes with the Bitaxe Gamma and place a soft pad such as felt or foam rubber underneath.
Step 3: less heat through clock and voltage
The fan has to remove as much heat as the miner draws in power. A Gamma at factory settings (525 MHz, 1150 mV) draws around 17 W at the wall. Overclocked to 625 MHz and 1250 mV it is around 25 W, roughly half as much heat again for just under 20 % more hashrate. If you have overclocked and want quiet, go back to the factory values first: in Settings pick the entries marked “(Default)”, Save.
Less clock and less voltage make it quieter still. The chip's power grows roughly with clock times voltage squared, the hashrate only with clock. A sensible quiet profile for the Gamma is 490 MHz and 1100 mV. Both are in the normal dropdown, so you do not need overclock mode. AxeOS then expects around 1.00 instead of 1.07 TH/s, just under 7 % less hashrate. By the rule of thumb the chip's power drops by around 15 %, and the fan has correspondingly less heat to move.
Lowering only the clock saves watts and therefore fan speed, but does not make the miner more efficient. Lowering the voltage makes it quieter and more efficient, until the voltage is no longer enough for the clock. Check after an hour: the one-hour average hashrate should reach at least 95 % of “Expected”, and the Error in the dashboard should stay low; permanently below 0.1 % is very good. What the Error means is covered in Bitaxe hashrate error explained.
Step 4: Noctua NF-A4x20 5V PWM instead of the stock fan

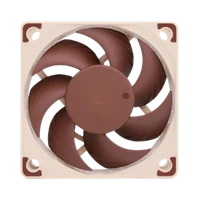
The Gamma's stock fan is a basic 40 mm fan, rated at 5,200 rpm in the draeger-it test. The Noctua NF-A4x20 5V PWM has the same 40 × 40 × 20 mm frame, runs on 5 V at 0.5 W and stays on AxeOS fan control through the PWM signal. In the measurement above, the Gamma was at least around 12 dB quieter at 5 cm with it. The Gamma hardware documentation also recommends a 5 V PWM Noctua (the slimmer NF-A4x10 there) “for a much more pleasant experience”.
Two details matter. First, the voltage: the Gamma supplies its fan with 5 V, and the same documentation warns explicitly: “Make sure to get a 5V fan! 12V spin, but slowly overheating your Bitaxe”. A 12 V fan does run on 5 V, but it does not cool enough. Look for “5V PWM” in the name when you buy. Second, according to our customers' feedback the Noctua moves somewhat less air than the stock fan. Automatic control compensates by letting it spin a little faster. In normal operation that is no problem; at the temperature limit, for example when overclocking, more cooling surface is the better step.
Does the plug fit?
The Gamma board has two fan connectors wired in parallel: a 4-pin header with 2.54 mm pitch, the same kind PC fans use, and a small 4-pin JST SH socket with 1 mm pitch. The Noctua has the usual PC plug. If the pin header is fitted, you simply plug it in. On some units, however, the stock fan is plugged into the small socket and the pin header is missing; in the draeger-it test it had to be soldered in. So look at the board before you buy. If you are unsure, send our support a photo.
Swapping the fan: how to do it
- Take notes first: after an hour of operation, write down fan percentage, speed (tooltip on the Fan card), chip and regulator temperature.
- Disconnect the miner from power.
- Unscrew the fan from the heatsink; in the draeger-it test these were Phillips screws for a PH1 screwdriver. Hold the heatsink while you do this so that it does not lift off the chip.
- Unplug the old connector and plug the Noctua onto the 4-pin header. Fit the fan with the same airflow direction as the old one; many fans have arrows on the frame for this.
- Route the cable so it cannot reach the blades, then screw the fan down.
- Power up and compare after an hour: the Fan card must show a speed, and the chip should sit at the target temperature. It is normal that the Noctua needs a few more percent to get there.
For a plain fan swap you do not need new thermal paste, because the heatsink stays on the chip. It is different if the heatsink shifted or lifted while you were working. You notice that because the fan afterwards spins clearly faster than before or stays at 100 %. In that case remove the cooler, clean off all the old paste, apply fresh paste and mount it again.
Rattling, grinding, whining: where does the noise come from?
Not every noise is fan speed. Two quick tests help you tell them apart:
- Listening test for the fan: in Settings switch “Automatic Fan Control” off briefly, set “Fan Speed” to about 40, 70 and 100 % in turn and click Save each time. If the noise changes with the speed, it comes from the fan. Switch automatic control back on right afterwards.
- Pause mining: the “Pause Mining” button at the top right switches the chip off and keeps the fan running at 30 %. If a high-pitched whine disappears while the fan keeps running, it comes from the power path, that is from the power supply or from the voltage conversion on the board. A test with another suitable power supply shows whether it is the power supply; what to look for is in Bitaxe power supply. “Resume Mining” continues.
A fan that grinds, rattles or shows clearly fewer rpm at the same percentage than it used to usually has a worn bearing; only a new one helps. Dust between the heatsink fins, on the other hand, makes the fan spin faster all the time. Blow it out carefully and hold the fan still while you do.
Step 5: more cooling surface with ICE Tower or AXP60

A bigger cooler sheds the same heat at a lower fan speed. With automatic control you therefore do not see the gain mainly in the temperature, but in the fan needing fewer percent for the same target. This is the step for warm rooms, continuous operation and everyone who overclocks and still wants quiet.
| Upgrade | Fits | What it does | Price |
|---|---|---|---|
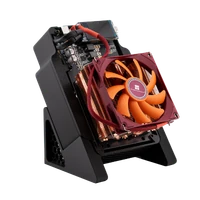
| ICE Tower Kit | Bitaxe Gamma, Nerdaxe Gamma | Tower cooler with a 40 mm Noctua; mount with 4-pin holder, thermal paste, four mounting pins and a PWM Y splitter included | €49.00 |
| ICE Tower Low Profile Kit | Bitaxe Gamma, Nerdaxe Gamma | Four copper heatpipes, flat fin block and a 60 mm Noctua; the strongest tier of the ICE Tower range | €69.00 |
| AXP60 Copperzilla 3.0 | Bitaxe Gamma, Nerdaxe Gamma | 210 g of solid copper, two heatpipes and a 60 mm fan; buffers load peaks and gives headroom for overclocking | €59.00 |
| Copper heatsinks | Bitaxe and NerdQaxe boards | Small coolers for voltage regulators and other hotspots; they lower the regulator temperature, not the noise | €5.00 |
| Noctua NF-A6x15 | 60 mm mounts, such as NerdQaxe Copper Pro and Performance Case | 60 × 60 × 15 mm, 5 V, 19.8 dB according to the manufacturer | €30.00 |
Whenever you change the cooler, fresh thermal paste goes on the chip; the ICE Tower kits include it. The small copper heatsinks go onto the component with an electrically insulating thermal pad and must never touch two contacts at once, otherwise you risk a short circuit.
Why the voltage regulator gets coolers of its own: AxeOS fan control only looks at the chip, and the fan above the heatsink barely cools the regulator. When overclocking, the regulator therefore often becomes the limit; in normal operation it rarely does. The small coolers do nothing for noise, but they add headroom.
ICE Tower and AXP60 do not fit the NerdQaxe and NerdOctaxe. Those come with larger fans, a 92 mm fan on the NerdQaxe++; the Copper Pro brings a solid copper cooler, and on the Hydro the noise comes from the radiator instead of the board. The Bitaxe Copperzilla has the copper cooler from the factory, but uses the headroom for more clock (750 instead of 525 MHz). If you mainly want it quiet, lower the clock.
Nerdaxe and NerdQaxe: fan control in NerdOS
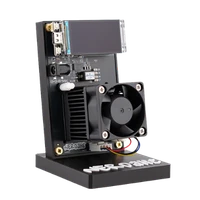
The Nerd devices do not run AxeOS but NerdOS, the firmware by shufps, currently version 1.1.0.1. You set the fans under Settings in the “Fan Controller” card.
- Loud out of the box: the original firmware runs the fan on “Manual” at 100 %. Set “Fan Controller” to “Auto Fan Control (PID)” and enter 60 °C under “Target Temp (°C)”, up to 65 °C for more quiet. OSM-OS sets PID control at 60 °C from the factory, and revision 7 of the NerdQaxe++ regulates to 65 °C from the start.
- Single-fan boards such as the Nerdaxe Gamma: the option “PID uses highest of ASIC and VReg temperature” is on by default. Unlike AxeOS, NerdOS therefore takes the voltage regulator into account as well. The Noctua NF-A4x20 5V PWM fits the 40 mm mount just as on the Bitaxe Gamma.
- Two-fan boards such as the NerdQaxe++: the “Voltage Regulator” section is set to “Linked”. The regulator fan then follows the chip fan, and control uses the higher of the two temperatures.
- “Shutdown Temperature (ASICs)”, 70 °C by default: if it is exceeded, NerdOS switches off the core voltage, sets the fans to 100 % and shows “MINER OVERHEATED” or “VREG OVERHEATED”. The miner does not start again by itself; restart it once the cause is fixed. Do not raise this value to gain quiet.
The NerdOS PID controller does not let the fan drop below 15 %; there is no adjustable minimum speed as in AxeOS. Changes to fan control apply after saving, without a restart. A NerdQaxe++ stays audible even when well tuned, because around 76 W of heat have to leave through the 92 mm fan and the regulator fan; we do not have our own sound measurement. More on the device is in the NerdQaxe++ review, and the differences between the two families in Bitaxe vs Nerdaxe.
The order in practice
- Record the starting point: after an hour, note fan percentage, rpm, chip and regulator temperature and the one-hour average hashrate. For your ears, measure with a sound level app on your phone, always from the same spot, at the same distance (about 1 m) and at the same time of day. The absolute values of phone apps are inaccurate, but the before and after comparison still works.
- Check Settings: “Automatic Fan Control” on, Frequency and Core Voltage at the values you want.
- Set Target Temperature to 62 to 65 °C, wait half an hour, compare.
- Improve the placement: free-standing, cool, decoupled.
- If overclocked: back to factory values, or the quiet profile of 490 MHz at 1100 mV.
- Fit the Noctua NF-A4x20 5V PWM if the fan still bothers you.
- Mount a bigger cooler if the fan still spins high despite everything, or if you want to overclock.
Frequently asked questions about making a Bitaxe quieter
Why is my Bitaxe fan suddenly stuck at 100 %?
What Target Temperature makes sense on a Bitaxe?
How low can I set Minimum Fan Speed?
How loud is a Bitaxe Gamma?
Is a Noctua fan worth it on a Bitaxe?
Noctua NF-A4x20: 5 V or 12 V?
Do I need new thermal paste when swapping the fan?
Will my Bitaxe run hotter with the Noctua?
Does underclocking make a Bitaxe quieter?
Can I pause my Bitaxe at night?
At what temperature does AxeOS step in?
How do I make a NerdQaxe++ quieter?
Matching products


Read more
Nerdaxe Gaia: what the BM1373 miner can do, which firmware to run and who it is for
A single BM1373 in the familiar Nerdaxe format: factory settings from the source code, hashrate and power draw with every documented figure, the 12-volt power supply, OSM-OS from the flasher, setup, overclocking up to the current limit, block odds and electricity cost, plus a comparison with the Nerdaxe Gamma, Bitaxe GT and NerdQaxe++.
Guides & knowledgeSetting up Stratum V2 on a Bitaxe: encrypted solo mining in five fields
Since AxeOS 2.14 every Bitaxe speaks Stratum V2, and since September 2026 so does the Bitaxe Pool. This guide walks through the AxeOS fields one by one, shows how to set up the fallback and verify the connection, and lists what goes wrong when no shares arrive. For Bitaxe, NerdQaxe and large ASICs.
Guides & knowledgeNerdQaxe++ review: 4.8 TH/s from four BM1370, and who should upgrade from a Bitaxe
Four BM1370 on one board, 4.9 TH/s expected out of the box, about 76 W, two fans and NerdOS in the browser: we put the NerdQaxe++ in context. Factory values from the firmware, board revisions, noise, running costs, block odds, setup in NerdOS and the comparison with the Bitaxe Gamma, GT and 702, Copper Pro, Hydro, NerdQX and NerdOctaxe.