
NerdQaxe++ setup: step by step to your first share
From unboxing to your first hashrate: setup Wi-Fi, home Wi-Fi, pool, your own Bitcoin address and fans in NerdOS 1.1. With real screenshots, normal values and help when something goes wrong.
This guide takes you from unboxing to your first hashrate. It applies to the NerdQaxe++ and its variants Copper Pro and Hydro, which run the same firmware. The devices run NerdOS, the firmware of the Nerd series; all screenshots show version 1.1.0.1. The Nerdaxe Gamma has its own guide, and the Bitaxe has the Bitaxe setup guide.
Nerdaxe_XXXX, under Settings enter your 2.4 GHz Wi-Fi and right away the pool: host stratum.bitaxe.de, port 3333, your own Bitcoin address as username. Save, Restart. Then open the IP from the display in your browser and set the fans to automatic control. Have these ready:
- The NerdQaxe++ and the 12 V power supply that came with it.
- Name and password of your Wi-Fi in the 2.4 GHz band. The ESP32 chip cannot receive 5 GHz networks.
- A Bitcoin address from your own wallet whose keys you hold. No Lightning address.
- A phone or laptop with Wi-Fi for the first setup.
Preparation
Five minutes before the power goes on
Unpack and check
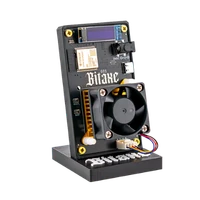
Check that both fans can spin freely and are connected firmly: the ASIC fan on connector M2, the voltage regulator fan on connector M1. Heatsink and cables should be undamaged. If something is missing or damaged, do not connect the miner and write to our support.
Choose the right spot
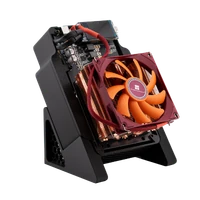
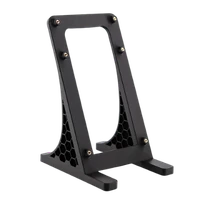
A NerdQaxe++ turns about 75 W into heat, roughly as much as a bright incandescent bulb. Place it on a firm surface with a free airflow path at intake and outlet, not in a closed cabinet. The stand holds it upright and improves airflow. Good Wi-Fi reception matters, otherwise the connection to the pool drops.
Only the right power supply
Use the 12 V power supply that came with the miner. A weaker supply sags under load and the miner keeps restarting. The USB-C port is only for flashing. On the Hydro variant, connect and fill the cooling loop before the miner gets power.
Connect power
First plug into the miner, then plug the power supply into the wall. After a few seconds display and fans start. In the original firmware the fans run at 100 % out of the box; that is loud but correct until you set up automatic control (chapter 6).
Check the display
As long as the miner knows no Wi-Fi, the display shows “CONFIG WIFI PORTAL” with the name of its setup Wi-Fi below, for example Nerdaxe_61C1. The name starts with “Nerdaxe_” on every Nerd device, including the NerdQaxe++. The four characters after it differ on every device.
Quick start in five steps
For everyone who has set up a Nerd miner before
Join the open Wi-Fi Nerdaxe_XXXX. The dashboard opens by itself, otherwise open http://192.168.4.1.
Under Settings, in “WiFi Settings”, enter hostname, Wi-Fi name and password.
In “Stratum Settings”, primary pool tab: stratum host stratum.bitaxe.de, port 3333, username your Bitcoin address, password x.
Save, then Restart. Open the IP address from the display in your browser.
Set the fan controller to “Auto Fan Control (PID)” at 60 °C, save, check hashrate and temperatures in the dashboard.
Connect Wi-Fi
Open the Wi-Fi settings on your phone or laptop and pick the open network Nerdaxe_XXXX with the four characters from the display. No password is needed.
After a few seconds the captive portal opens the NerdOS dashboard. Unlike on the Bitaxe there is no separate setup page; you set everything in the normal settings. If nothing opens, go to http://192.168.4.1 in the browser.
Open Settings in the menu. The “Language / Langue” card at the very bottom switches the interface language; your browser remembers the choice.
In the WiFi Settings card enter a Hostname, for example nerdqaxe. You will later also reach the miner as http://nerdqaxe.local. Devices with OSM-OS show OSM-Miner there by default.
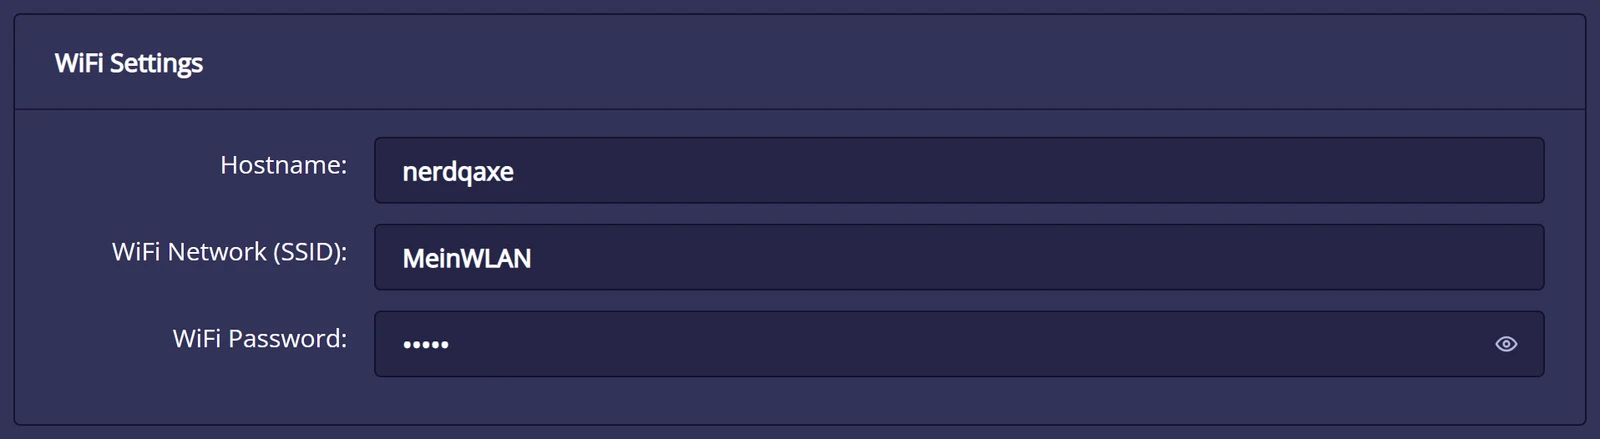
Enter the name of your Wi-Fi under WiFi Network (SSID) or search with the magnifier, and the password under WiFi Password. Mind upper and lower case.
Do not save yet; enter the pool first (next chapter). That way you only need one restart.
Pool and Bitcoin address
We recommend our solo pool pool.bitaxe.de: 0 % fee, server in Frankfurt, no account, and if your miner finds a block, the reward goes straight to your address. The pool configurator creates the values to copy; alternatives are in choosing a mining pool.
In the Stratum Settings card the pool mode stays on “Failover (Primary/Fallback)”. The “Primary Stratum Pool” tab is open.
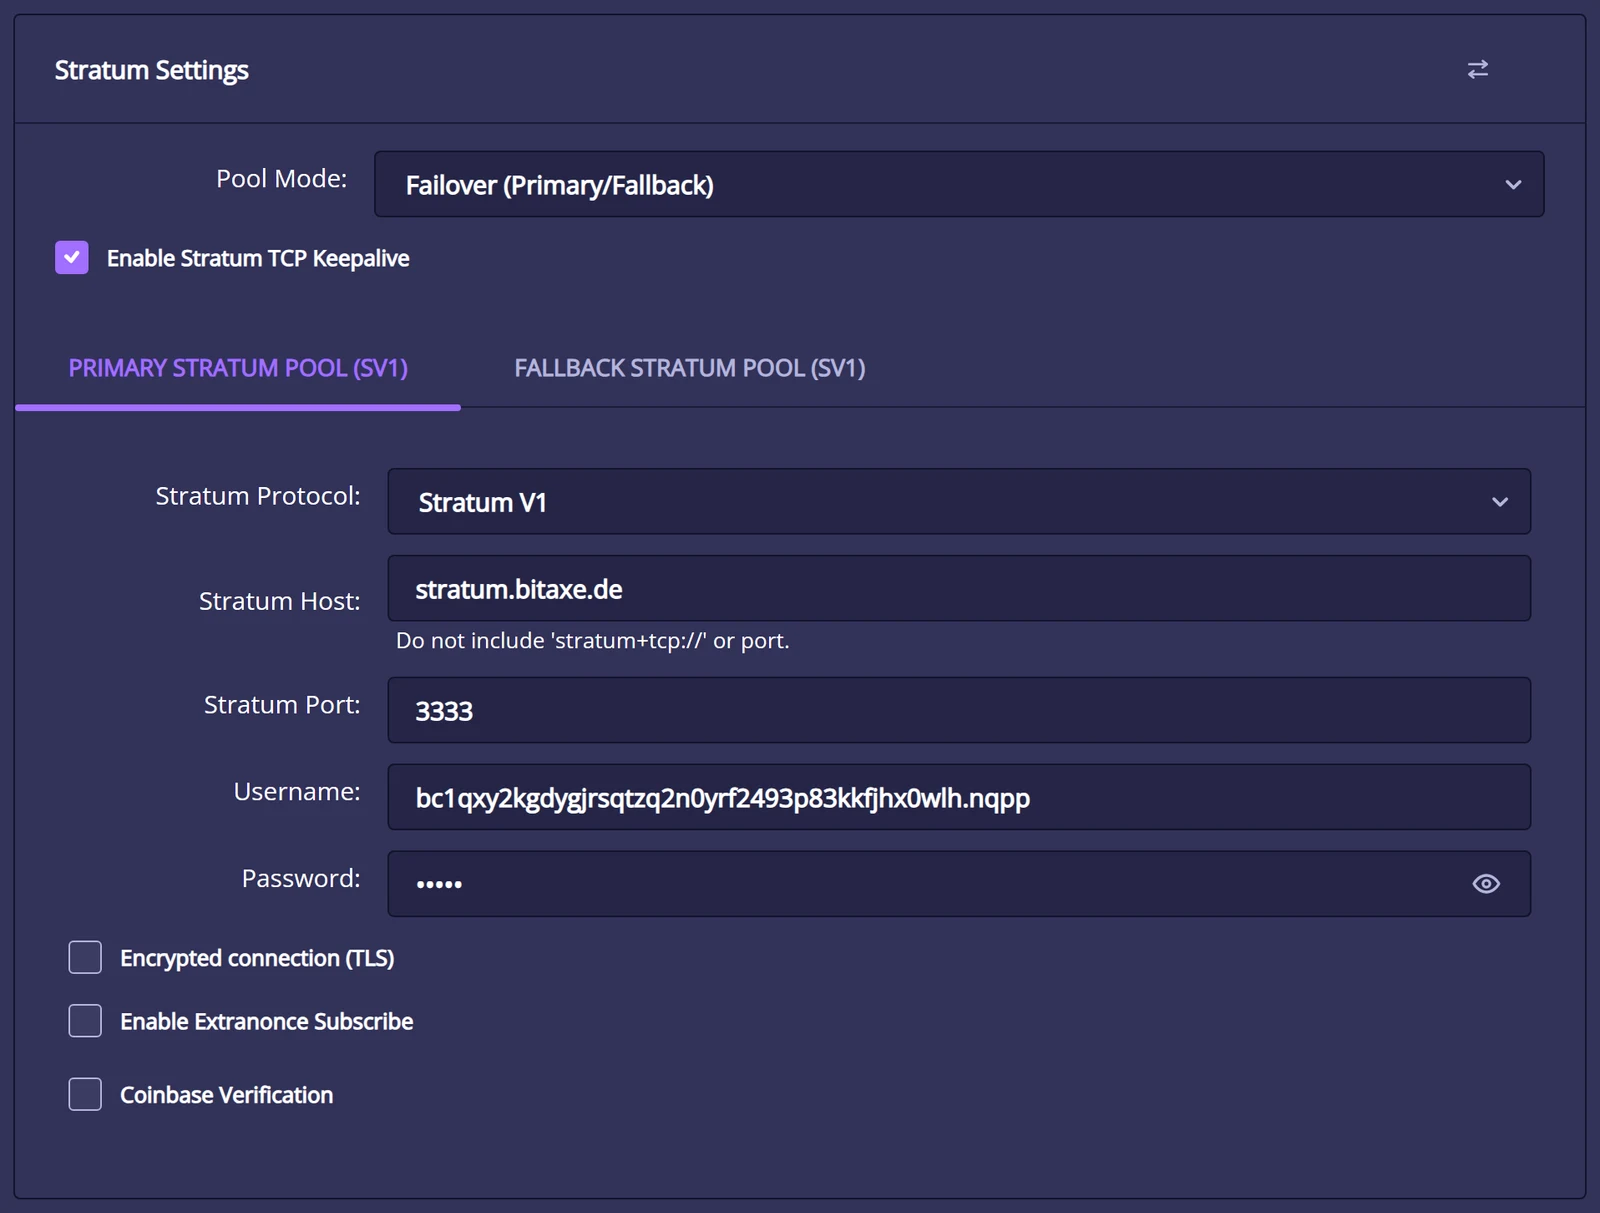
Leave Stratum Protocol on “Stratum V1”. Under Stratum Host enter stratum.bitaxe.de, without stratum+tcp:// and without a port; the interface itself points this out.
Stratum Port: 3333.
The Username field contains a foreign address out of the box. Delete it completely and enter your own Bitcoin address. Optionally append a device name after a dot, for example bc1q…your-address.nqpp.
Password: x. Leave the boxes “Encrypted connection (TLS)”, “Enable Extranonce Subscribe” and “Coinbase Verification” unticked.
The “Fallback Stratum Pool” tab is empty out of the box. You can enter a second pool there that steps in when the first cannot be reached; it is not required.
Scroll down, click Save and then Restart. The miner restarts, joins your Wi-Fi and shows its IP address at the top of the display, for example 192.168.20.205.
Stratum V2: the encrypted protocol also works with NerdOS 1.1 and our pool on port 3336. V1 is enough to start; how to switch is shown in setting up Stratum V2.
Start and check
Reconnect your phone or laptop to your normal Wi-Fi and open the IP address from the display or http://nerdqaxe.local in the browser. After one or two minutes all values have settled.
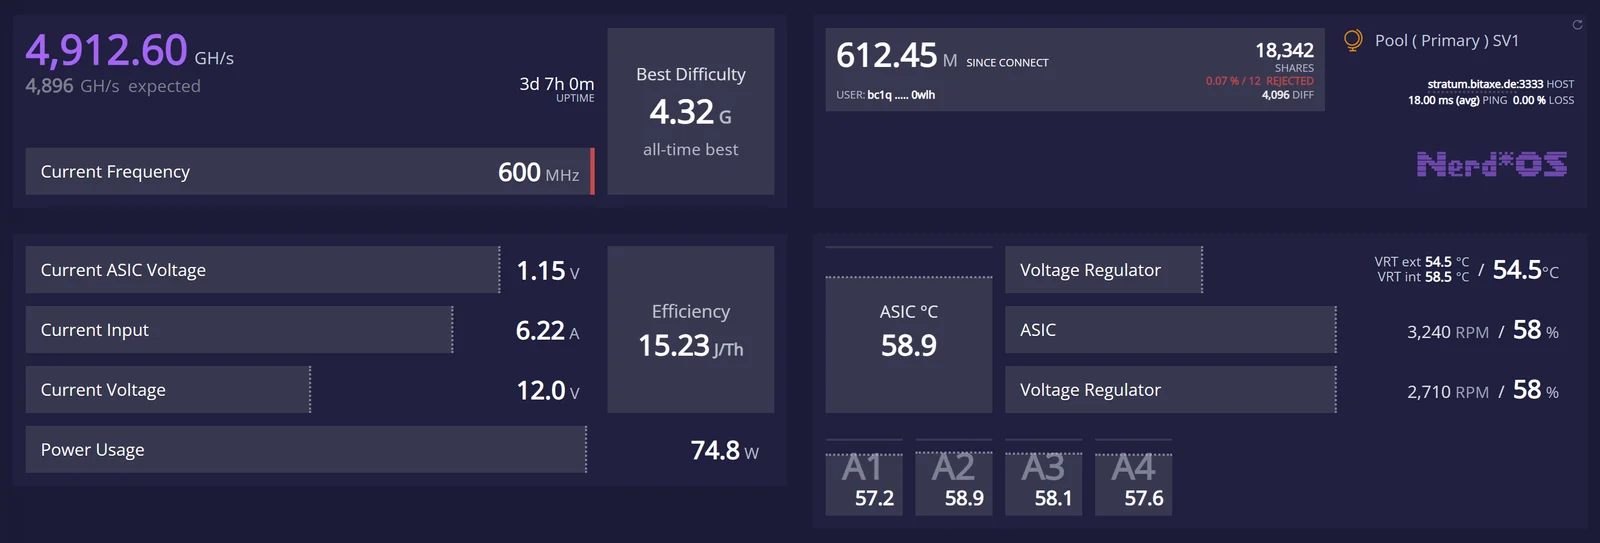
The Hash Rate should be close to the “expected” value. On a NerdQaxe++ at 600 MHz that is about 4,896 GH/s, just under 4.9 TH/s. Short fluctuations are normal.
In the pool card the Shares keep rising and “Rejected” stays well below one percent. The card also shows the host stratum.bitaxe.de:3333 and the ping to the pool.
The input voltage is close to 12 V and the power usage around 70 to 80 W. Efficiency in J/TH tells you how much energy one terahash costs.
The temperatures are on the right: “ASIC Temp” is the hottest of the four chips, A1 to A4 individually below, the voltage regulator next to it. If the chips stay below 65 °C, everything is fine.
Check in the pool: on pool.bitaxe.de enter your Bitcoin address in the search field. After a few minutes your miner shows up with its hashrate. How high your chance of a block is, is shown in finding a block, and the mining calculator works out the running cost.
Fans and temperature
The original firmware runs the fans at a fixed 100 % out of the box. That cools reliably but is louder than necessary. OSM-OS already regulates to 60 °C out of the box. This is how you set up automatic control:
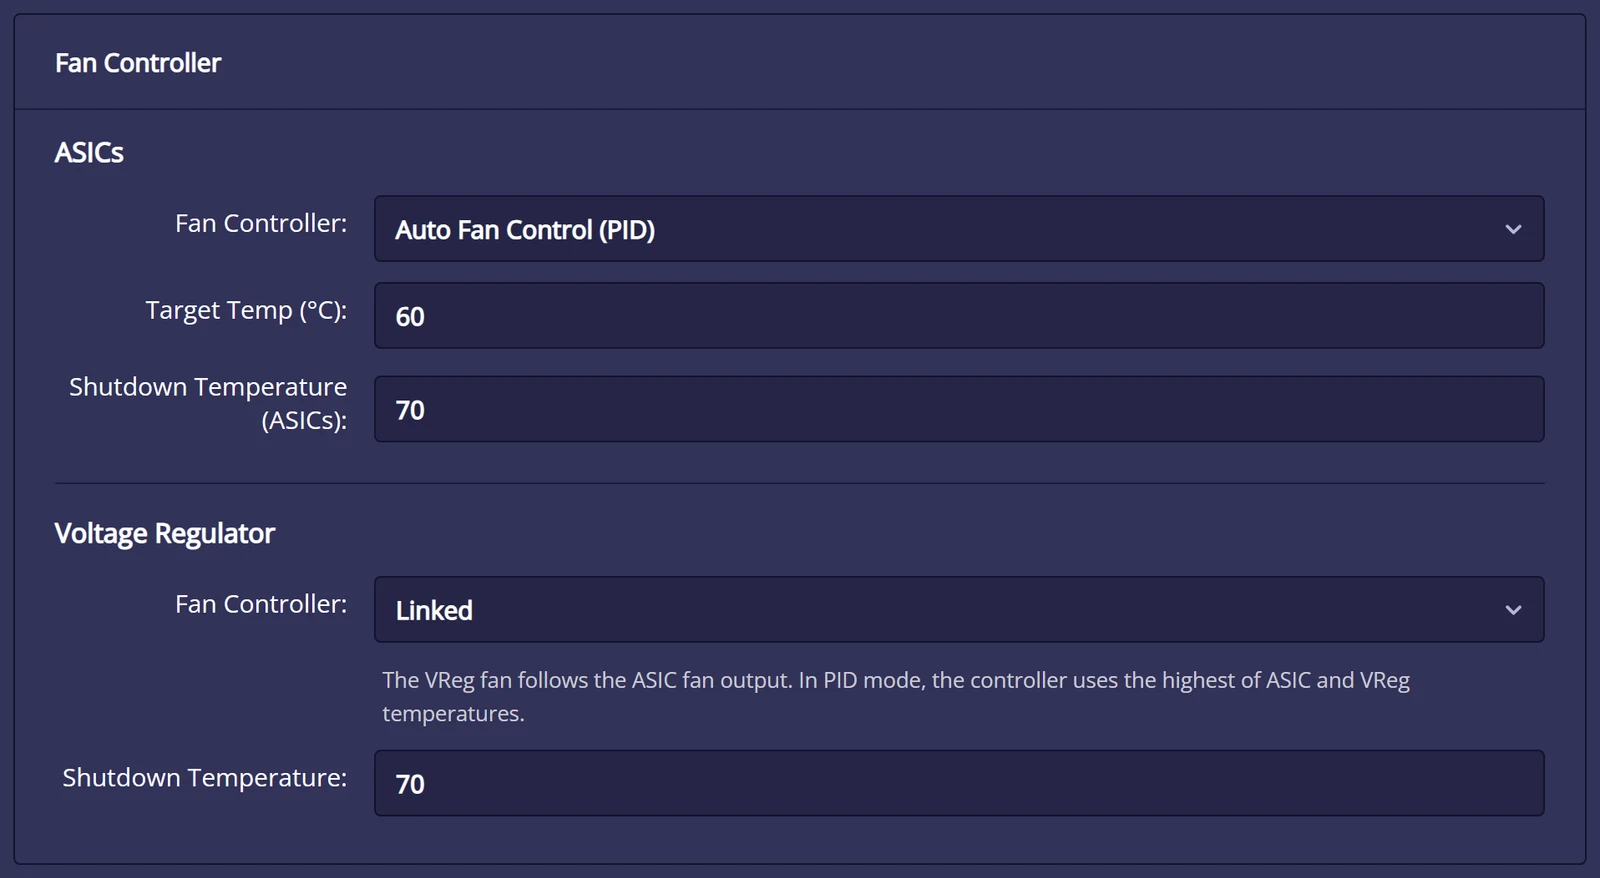
In the Fan Controller card, ASICs section, choose “Auto Fan Control (PID)”.
Enter 60 °C as Target Temp. The controller then holds the chips at that temperature and only spins the fans up as far as needed.
Shutdown Temperature is 70 °C out of the box. If a chip reaches it, NerdOS switches the chips off, sets the fans to 100 % and shows “MINER OVERHEATED”; the miner then needs a restart. Do not raise this value.
For the voltage regulator keep “Linked”: its fan follows the ASIC fan, and control uses the higher of the two temperatures. Save, done; fan settings do not need a restart.
Frequency and core voltage in the “Mining Settings” card are 600 MHz and 1150 mV out of the box, marked “(default)”. Leave them until the miner has run stably for a few days. How to get more hashrate afterwards is in the overclocking guide; how to make the miner quieter in making a miner quieter.
Keep the firmware current
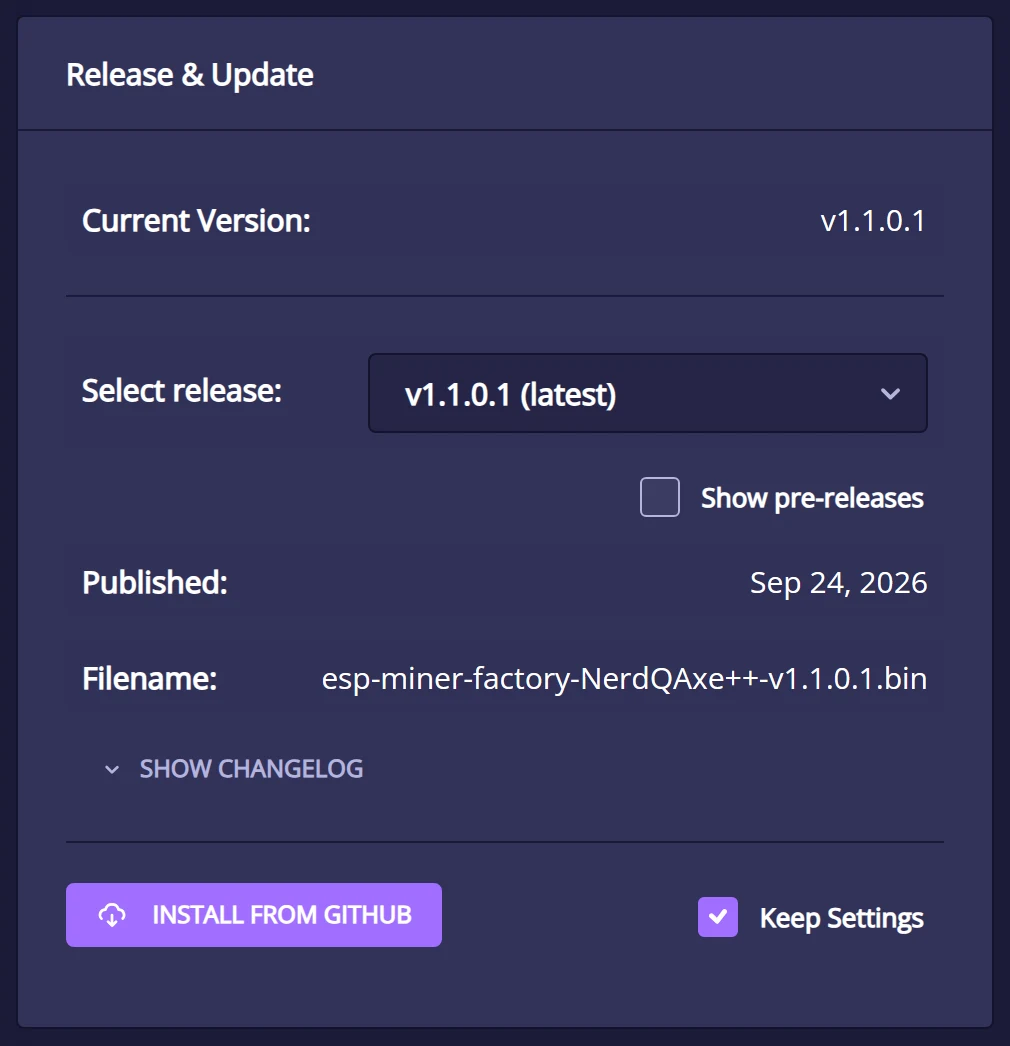
NerdOS can update itself. The settings have a “Release & Update” card for it: choose a version, leave “Keep Settings” ticked, “Install from GitHub”. The two routes are summarised here; all details are in the firmware update guide.
Method A: update with flasher.bitaxe.de (recommended)
• Open flasher.bitaxe.de in Chrome, Edge or Opera on desktop and choose the NerdQaxe++ tile (also for Copper Pro and Hydro). OSM-OS is preselected and our recommendation; if you want the originals, choose AxeOS original.
• Leave “Keep configuration” ticked. The flasher then writes firmware and web interface; Wi-Fi, pool and address are kept.
• Click “Install firmware”, pick the serial port and wait until the bar reaches 100 %.
Method B: update in NerdOS
• Leave “Keep Settings” ticked, then “Install from GitHub”. The miner downloads firmware and web interface itself and restarts.
• Under OSM-OS there are two cards, one for OSM-OS and one for the official firmware.
• If you enabled OTP, NerdOS asks for the six-digit code first.
Solving problems and FAQ
The most common problems and their fixes are below. Faster still is the miner troubleshooter. If you get stuck, write to our support with your order number and a screenshot of the dashboard.
The Wi-Fi “Nerdaxe_XXXX” does not appear.
• Move closer to the miner and scan again, briefly disconnect and reconnect the power supply.
• Nerd devices have no button to switch the setup Wi-Fi on. If the stored Wi-Fi cannot be reached, the miner opens it by itself after a restart.
The dashboard does not open on the setup Wi-Fi.
http://192.168.4.1 in the browser while connected to Nerdaxe_XXXX.• Turn off mobile data on the phone for a moment so it does not fall back to the mobile network.
The NerdQaxe++ does not find my Wi-Fi or does not connect.
• In a guest network, communication between devices must be allowed (turn off settings like “AP/client isolation”).
• The magnifier search only works while the setup Wi-Fi is active. You can always type the name in by hand.
How do I find the IP address of my NerdQaxe++?
• Alternatively look for the hostname in your router’s list of connected devices or open
http://hostname.local. No hashrate is shown after the start.
stratum.bitaxe.de without stratum+tcp://, port 3333, username with your address. Save and Restart.• If the pool card says “Stratum not connected for this pool”, the miner cannot reach the pool; check Wi-Fi and host.
• If the hashrate stays at zero, the miner troubleshooter helps.
The fans are very loud.
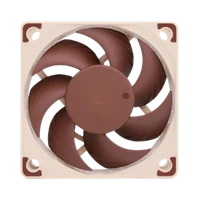
• Better fans and a cooler spot help further; more in making a miner quieter.
The display shows “MINER OVERHEATED” or “VREG OVERHEATED”.
• Fix the cause: check the fans, clear the airflow path, undo overclocked values, choose a cooler spot.
• Then restart the miner; it does not resume by itself.
The display shows “PSU FAULT” or the miner keeps restarting.
• More in power supply for Bitaxe and Nerd miners.
A notice says “The web interface is unprotected”. Do I have to do anything?
• If you lose the app, as far as we know only a reset via factory install remains. So only enable OTP if you keep the access safe.
The display is upside down or hard to read.
• “Automatic Screen Shutdown” turns the display off after a while; a button press wakes it again.
What does the pool mode “Dual Pool” mean?
How do I reset the NerdQaxe++ completely?
• Alternatively install under “Release & Update” in NerdOS without “Keep Settings”.
• Afterwards Wi-Fi, pool, address and OTP are erased; note the values first.
Safety, power and location
Location
- Firm surface, free airflow path, not on carpet or fabric and not in a closed cabinet.
- No moisture nearby; on the Hydro variant check hoses and fittings for leaks regularly.
- Room temperature rises in summer and with it the chip temperature; automatic fan control compensates up to a point.
Power supply
- Only use the supplied or an equivalent 12 V power supply with enough power.
- Plug in firmly, do not kink the cable or put it under strain.
- Disconnect the power before moving or cleaning the miner.
Network and access
- Without protection, every device on your Wi-Fi can change settings. NerdOS offers two-factor protection (OTP) with an authenticator app under Security; the notice “The web interface is unprotected” points to it.
- Do not expose the miner to the internet with port forwarding.
- Only install firmware from known sources, easiest via flasher.bitaxe.de.
Tools for the setup
Help after the setup
After the first start these topics matter most for stable operation, pool choice and optimisation.
Products for your NerdQaxe setup
If you want to pick hardware or accessories after the guide, these are the next steps.