

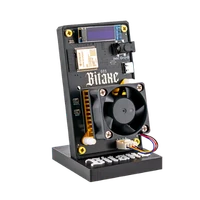

Set up your NerdQaxe
This guide shows you clearly how to get your NerdQaxe++ running. From the Wi-Fi setup through pool and wallet to the firmware – all in clear steps.
This guide takes you from the first start-up to mining in the dashboard. The description is deliberately simple and free of jargon – ideal for newcomers too.
Your device at a glance
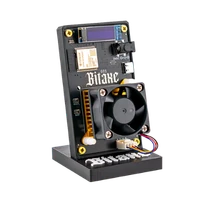
The NerdQaxe++ is an open-source miner for home use. During setup you connect it to your 2.4 GHz Wi-Fi, store your pool details and enter your Bitcoin address as the stratum user. After that the dashboard shows you whether everything runs as intended.
Performance & consumption
Hash rate: the NerdQaxe++ typically reaches around 4.8 TH/s.
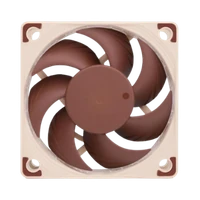
Power draw is around 80 watts, depending on your settings; the 92 mm fan keeps the four ASICs quiet in a living space. The first hash rate values appear in the dashboard after one or two minutes.
If you bought your NerdQaxe++ from us, thank you for your trust!
Have ready
To make the start smooth, keep the following within reach:
- your NerdQaxe+ or NerdQaxe++ miner
- the credentials for your 2.4 GHz Wi-Fi (name & password)
- your Bitcoin address (on-chain) – not a Lightning address
- the power supply with the round DC plug (barrel 5.5 × 2.1 mm, 12 V DC / 10 A)
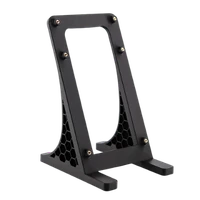
- the NerdQaxe mount
Preparation
for absolute beginners
In this section you get your NerdQaxe++ ready to start.
You unpack everything, check that nothing is missing, find the right spot and connect the power supply. No prior knowledge needed – we explain every step calmly.
STEP 1
UNPACK
Unpack everything carefully. Lay all parts out and remove the protective films.
STEP 2
CHECK THE CONTENTS
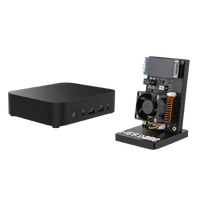
Check what is in the box. It should contain the NerdQaxe++, the mount and the PSU (power supply). If something is missing or looks damaged, contact the shop or support.
STEP 3
VISUAL CHECK
Inspect the device. Look at the heatsink, the cables and the fan. Nothing should be loose. The fan should turn freely. Make sure the round DC (barrel) connector is firm. The display is only plugged on – that is normal, not a defect.
STEP 4
CHOOSE A SPOT
Find the right location. The miner is best placed on a firm, level surface with air circulation. A socket and Wi-Fi should be within reach. Keep it away from heat sources and moisture.
STEP 5
THE RIGHT POWER SUPPLY
Your NerdQaxe++ needs 12 V DC / 10 A, barrel 5.5 × 2.1 mm. No USB-C power.
STEP 6
PREPARE THE POWER SUPPLY
Do not plug the PSU in yet; untangle the cable so that nothing is under tension.
STEP 7
CONNECT THE POWER SUPPLY TO THE DEVICE
Insert the power connector. Guide the barrel plug straight into Power In, without tilting or bending it.
STEP 8
CONNECT POWER
Switch it on. Plug the PSU into the socket. After one or two seconds the display and fan start.
STEP 9
START SCREEN
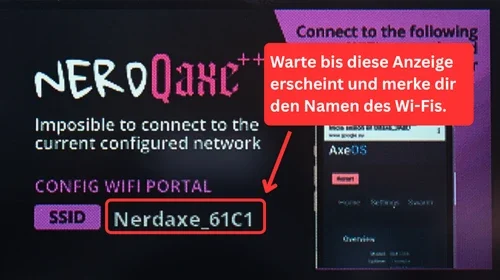
Check the Wi-Fi name. The display shows NerdQAxe_XXXX. Note that SSID down.
STEP 10
NEXT
On to the Wi-Fi setup. Continue with the section connect Wi-Fi below.
Quick start in 3 steps
For the experienced: connect Wi-Fi, set the pool, check briefly – done.
1. Connect Wi-Fi: join NerdQAxe_XXXX. If no page opens, enter http://192.168.4.1 in your browser.
2. Enter pool & wallet: in the dashboard under Pool Settings enter stratum host pool.opensourceminers.de, port 3333, your Bitcoin address as the stratum user and password x. Ready-made values: pool configurator. Then Save and Restart.
3. Check in AxeOS: look at hash rate, accepted shares and temperature on the dashboard.
Connect Wi-Fi
In short: in this section you connect your NerdQaxe++ to your Wi-Fi and open the AxeOS dashboard in a browser to set everything up.
Step 1: if you have already done the preparation, your NerdQaxe++ should be switched on and ready. Starting here? Then plug the power supply in now – after one or two seconds you hear the fan start and the display lights up.
Step 2: the display now shows your miner’s Wi-Fi name (for example NerdQAxe_XXXX). Open the Wi-Fi settings on your phone, laptop or tablet and select exactly that network.
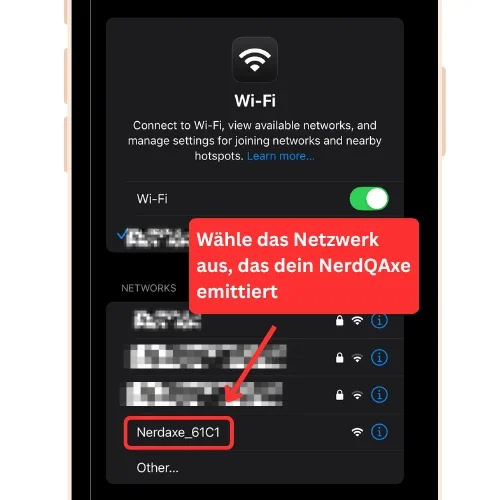
Step 3: in most cases the setup page opens automatically. If it does not, enter http://192.168.4.1 manually in your browser’s address bar.
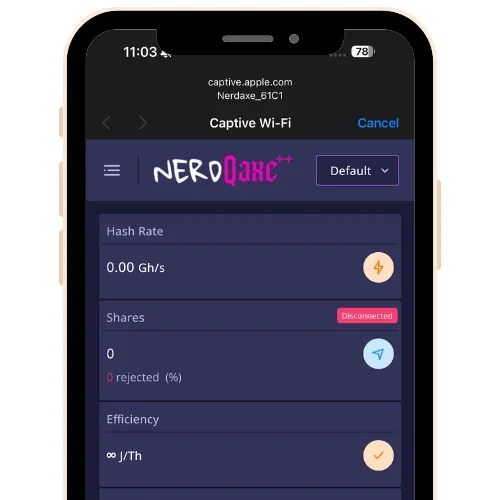
Step 4: open “Settings” in the AxeOS dashboard. There you can set any hostname you like.
Step 5: enter your Wi-Fi SSID and password exactly. Unsure? Tap the eye icon to show the password and check what you typed.
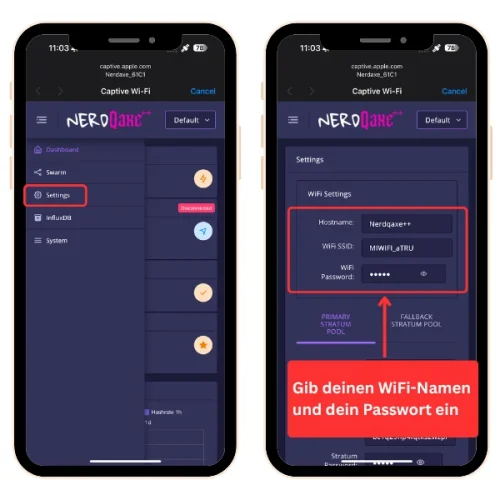
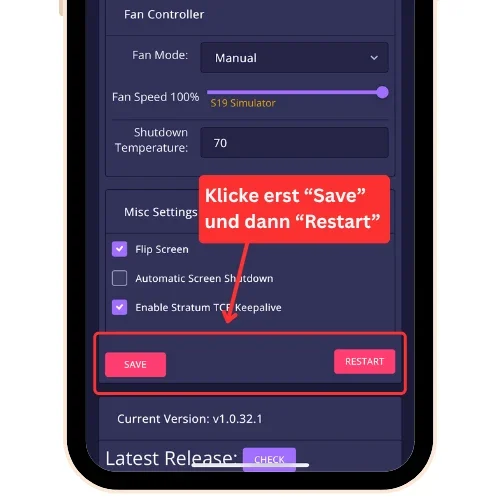
Step 6: store the details with “Save”.
Step 7: click “Restart” so your NerdQaxe reboots.
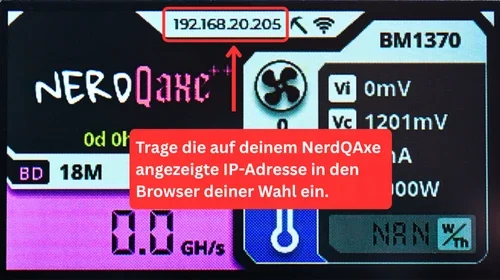
Step 8: the miner joins your home Wi-Fi and already starts mining. The display shows an IP address (for example 192.168.20.234). Note it down – you will use it to open the AxeOS dashboard.
Enter pool & wallet
In short: you open Pool Settings, enter host, port and your Bitcoin address as the stratum user, save and restart.
Step 1: open the dashboard at the IP address shown on the display (for example http://192.168.20.234).
Step 2: go to “Pool Settings”.
Step 3: enter the host of your pool: pool.opensourceminers.de.
Step 4: add port 3333.
Step 5: enter your Bitcoin address (on-chain) as the stratum user. Replace the default address completely – no spaces.
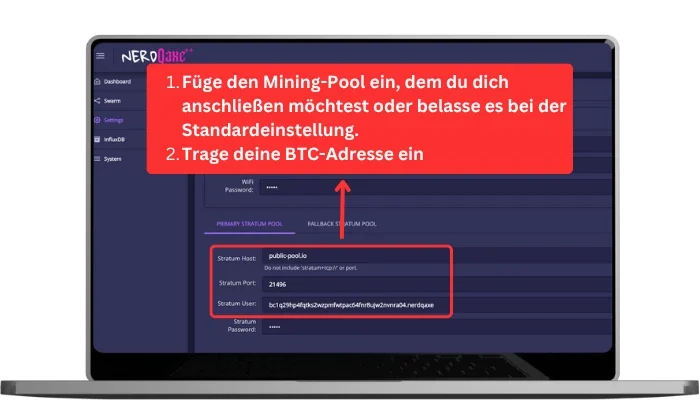
Step 6 (optional): append a .worker to your address, for example .miner1, to tell your devices apart in the pool.
Step 7: enter password x – pool.opensourceminers.de does not check it, but the field must not be empty.
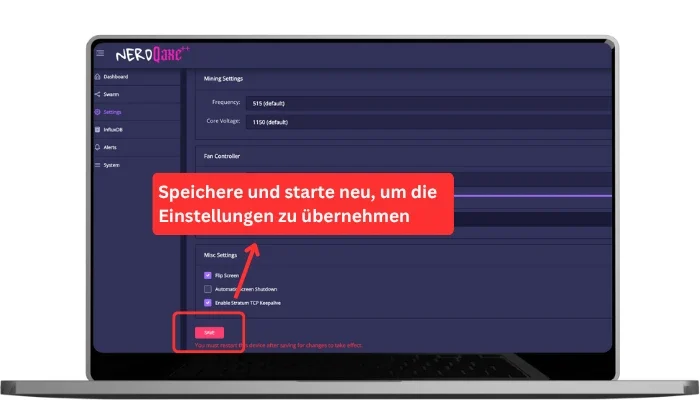
Step 8: click “Save” to store the settings.
Step 9: click “Restart” so the NerdQaxe++ reboots and connects to the pool.
Start & monitor mining
In short: here you see whether your NerdQaxe is working properly. The dashboard shows the hash rate, the counted accepted shares and the temperature. Take a moment to check. If something stands out, the notes below help.
Step 1: open the AxeOS dashboard at the IP address if it is not open already.
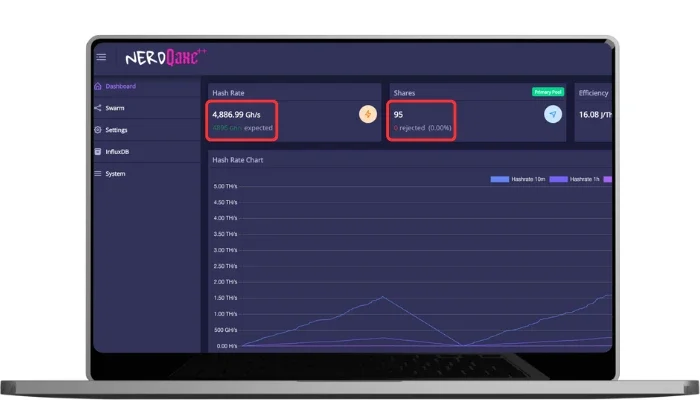
Step 2: after one or two minutes the hash rate should rise to the expected value (around 4.8 TH/s).
Step 3: the “accepted” figures rise over time, “rejected” should stay as close to zero as possible.
Step 4: watch the performance for a few minutes to be sure everything runs stably.
Step 5: if no values appear, check host, port and BTC address on the pool tab. Improve the Wi-Fi signal if needed.
Step 6: once values appear, check the stability briefly: accepted should keep rising, rejected should stay close to 0 %. Keep an eye on the temperature and pick a cooler spot or more airflow if it runs high.
Step 7: your NerdQaxe is now running and mining – the setup is complete!
Done – your NerdQaxe++ is running!
Your miner runs stably and is ready for continuous use. The chapters below are optional and show you how to improve your setup or solve small problems yourself.
Update the firmware & restart
In short: a firmware update brings AxeOS bug fixes and new features. The easiest way is our web flasher over USB-C – Wi-Fi and pool settings are kept. Alternatively you upload the files in the dashboard. Both routes are below as method A and B.
Method A – web flasher (recommended and easiest)
• Connect the NerdQaxe via USB-C directly to your computer – a data cable, not a USB hub. The device can keep running.
• Open flasher.bitaxe.de in Chrome, Edge or Opera on desktop.
• Click your device tile. “AxeOS original” is preselected; switch at the top if you want the optimized OSM-OS builds.
• Leave “Keep configuration” ticked – then Wi-Fi, pool and Bitcoin address survive the update.
• Click “Install firmware” and pick your miner’s serial port in the browser dialog.
• Wait until the bar reaches 100 %. The miner reboots and is back on the network after about 30 seconds.
Firefox and Safari cannot flash over serial. There you use method B.
Method B – online update (in the dashboard)
• Switch to Settings and click Check to look for newer firmware.
• If a new version is offered, download the two linked files: esp-miner.bin (firmware) and www.bin (web interface).
• Update the web interface first (Update Website → +Browse → www.bin), then the firmware (Update Firmware → +Browse → esp-miner.bin). Wait about 60 seconds; the device reboots automatically.
The order matters: www.bin first, then esp-miner.bin – and do not disconnect power during the update.
Solving problems & FAQ
In short: here you find common questions and simple solutions around your NerdQaxe++. If something does not work, go through the points step by step – usually the problem is solved quickly.
How do I set up the NerdQaxe++?
How do I connect the NerdQaxe++ to Wi-Fi?
Why do I see no hash rate?
Why does the Wi-Fi network not appear?
How do I find the IP address of my NerdQaxe?
Why is my password shown as wrong?
How do I fix Wi-Fi drop-outs or connection problems?
Why is my reject rate high (above 1 %)?
What if the AxeOS dashboard does not load?
How do I reset the NerdQaxe++ completely?
Why is the display upside down or unreadable?
How do I prevent overheating?
Safety & location
Summary: place your device safely and keep it clean to keep operation stable.
- Provide good air circulation (at least 10 cm of space around the device).
- Use only the recommended power supply: 12 V DC / 10 A, barrel 5.5 × 2.1 mm.
- USB-C is for data only – not for power.
- Keep the NerdQaxe++ clean and free of dust.
- Do not leave it running unattended in closed rooms without ventilation.